Useful links
- http://www.harbaum.org/till/mist/mist.html
- https://github.com/mist-devel/mist-board/wiki
- PhilsComputerLab Youtube Channel
What is FPGA
I will put at as easy as possible: FPGA is a set of hardware (usually just a pcb-board) where components can be configured dynamically to replicate other hardware. The functions (logical operations and functions of the cpu) of this set are not hardwired and can be set using the so called cores during the start.
What are cores?
Cores are set of instructions or rules, which allow to adjust the fpga guts so that they works as another hardware. You can reimplement home computers, gaming consoles and arcade games, for example. There are some fpga-based devices out there, which are well known. Everdrives are fpga-based clones of game cartridges, AVS nes and Analogue NT are fpga-based clones of the NES, etc. The advantage of the fpga is that you can always review and update the core or write a new one. Your single fpga-board can work with multiple different cores and the mist allows you to change them on the fly.
In order to work with modern monitors, usb or SD cards, these cores also have the corresponding changes so that older “hardware” (which is being reimplemented) can interact with them.
The list of all available cores for the mist can be viewed here.
Fun fact: the mist is the acronym (syllabic abbreviation, to be more precise) of aMIga and atari ST. Together: MIST. This is because these are the main cores for this device. In English mist means a fog-like dark environment. In German it means “manure”.
After checking most cores, I can say that those for Amiga, Atari 2600 and Atari ST work very good. There are also other cores out there, but they aren’t optimized that well. Some have a lot of limitations, other are almost perfect (like NES). But you need to keep in mind, that this machine is intended for Amiga and Atari ST in the first place. All other cores are nice add-ons.
What is MiST
Mist is a FPGA-based device with USB ports, buttons, VGA-ouput, SD-card support, joystick ports, etc. It is based on Altera Cyclone III and has 32 Mb 16-bit SDRAM. It can be reconfigured using cores to replicate a big number of home computers or gaming consoles.
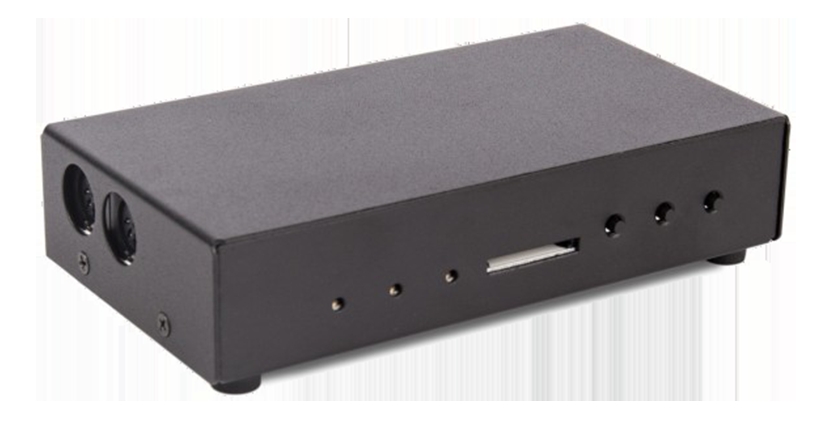
 Board specifications
- Based on Altera Cyclone EP3C25 FPGA board
- 32 Mb 16-bit SDRAM
- ARM IO Controller AT91SAM7S56
- USB Host Controller MAX3421E
- USB-Hub TUSB2046
Interfaces
- Analog VGA output
- Stereo analog audio output via 3.5 jack
- 4 USB (2.0) ports
- Micro-USB port for power supply and IO controller updates
- 2 classic 9-pin DB9 Atari style connectors for joysticks
- SD-Card slot (normal size)
- 3 LEDs (power, FPGA and IO Controller)
- 3 buttons (reset, menu, user defined)
- 2 Midi outputs (on version 1.3)
- Power slider
What you need
- VGA cable
- VGA-compatible monitor
- Micro-USB-cable and optionally a charger (like a usual smartphone charger) or you can connect to a powered USB hub or PC.
- USB keyboard (extended, to use NumLock button)
- USB mouse
- USB gaming controller
- You can also use original 9-pin joysticks or midi-equipment
- SD-card (FAT32) (some cores require Fat16, but most work with Fat32).
Starting the MiST
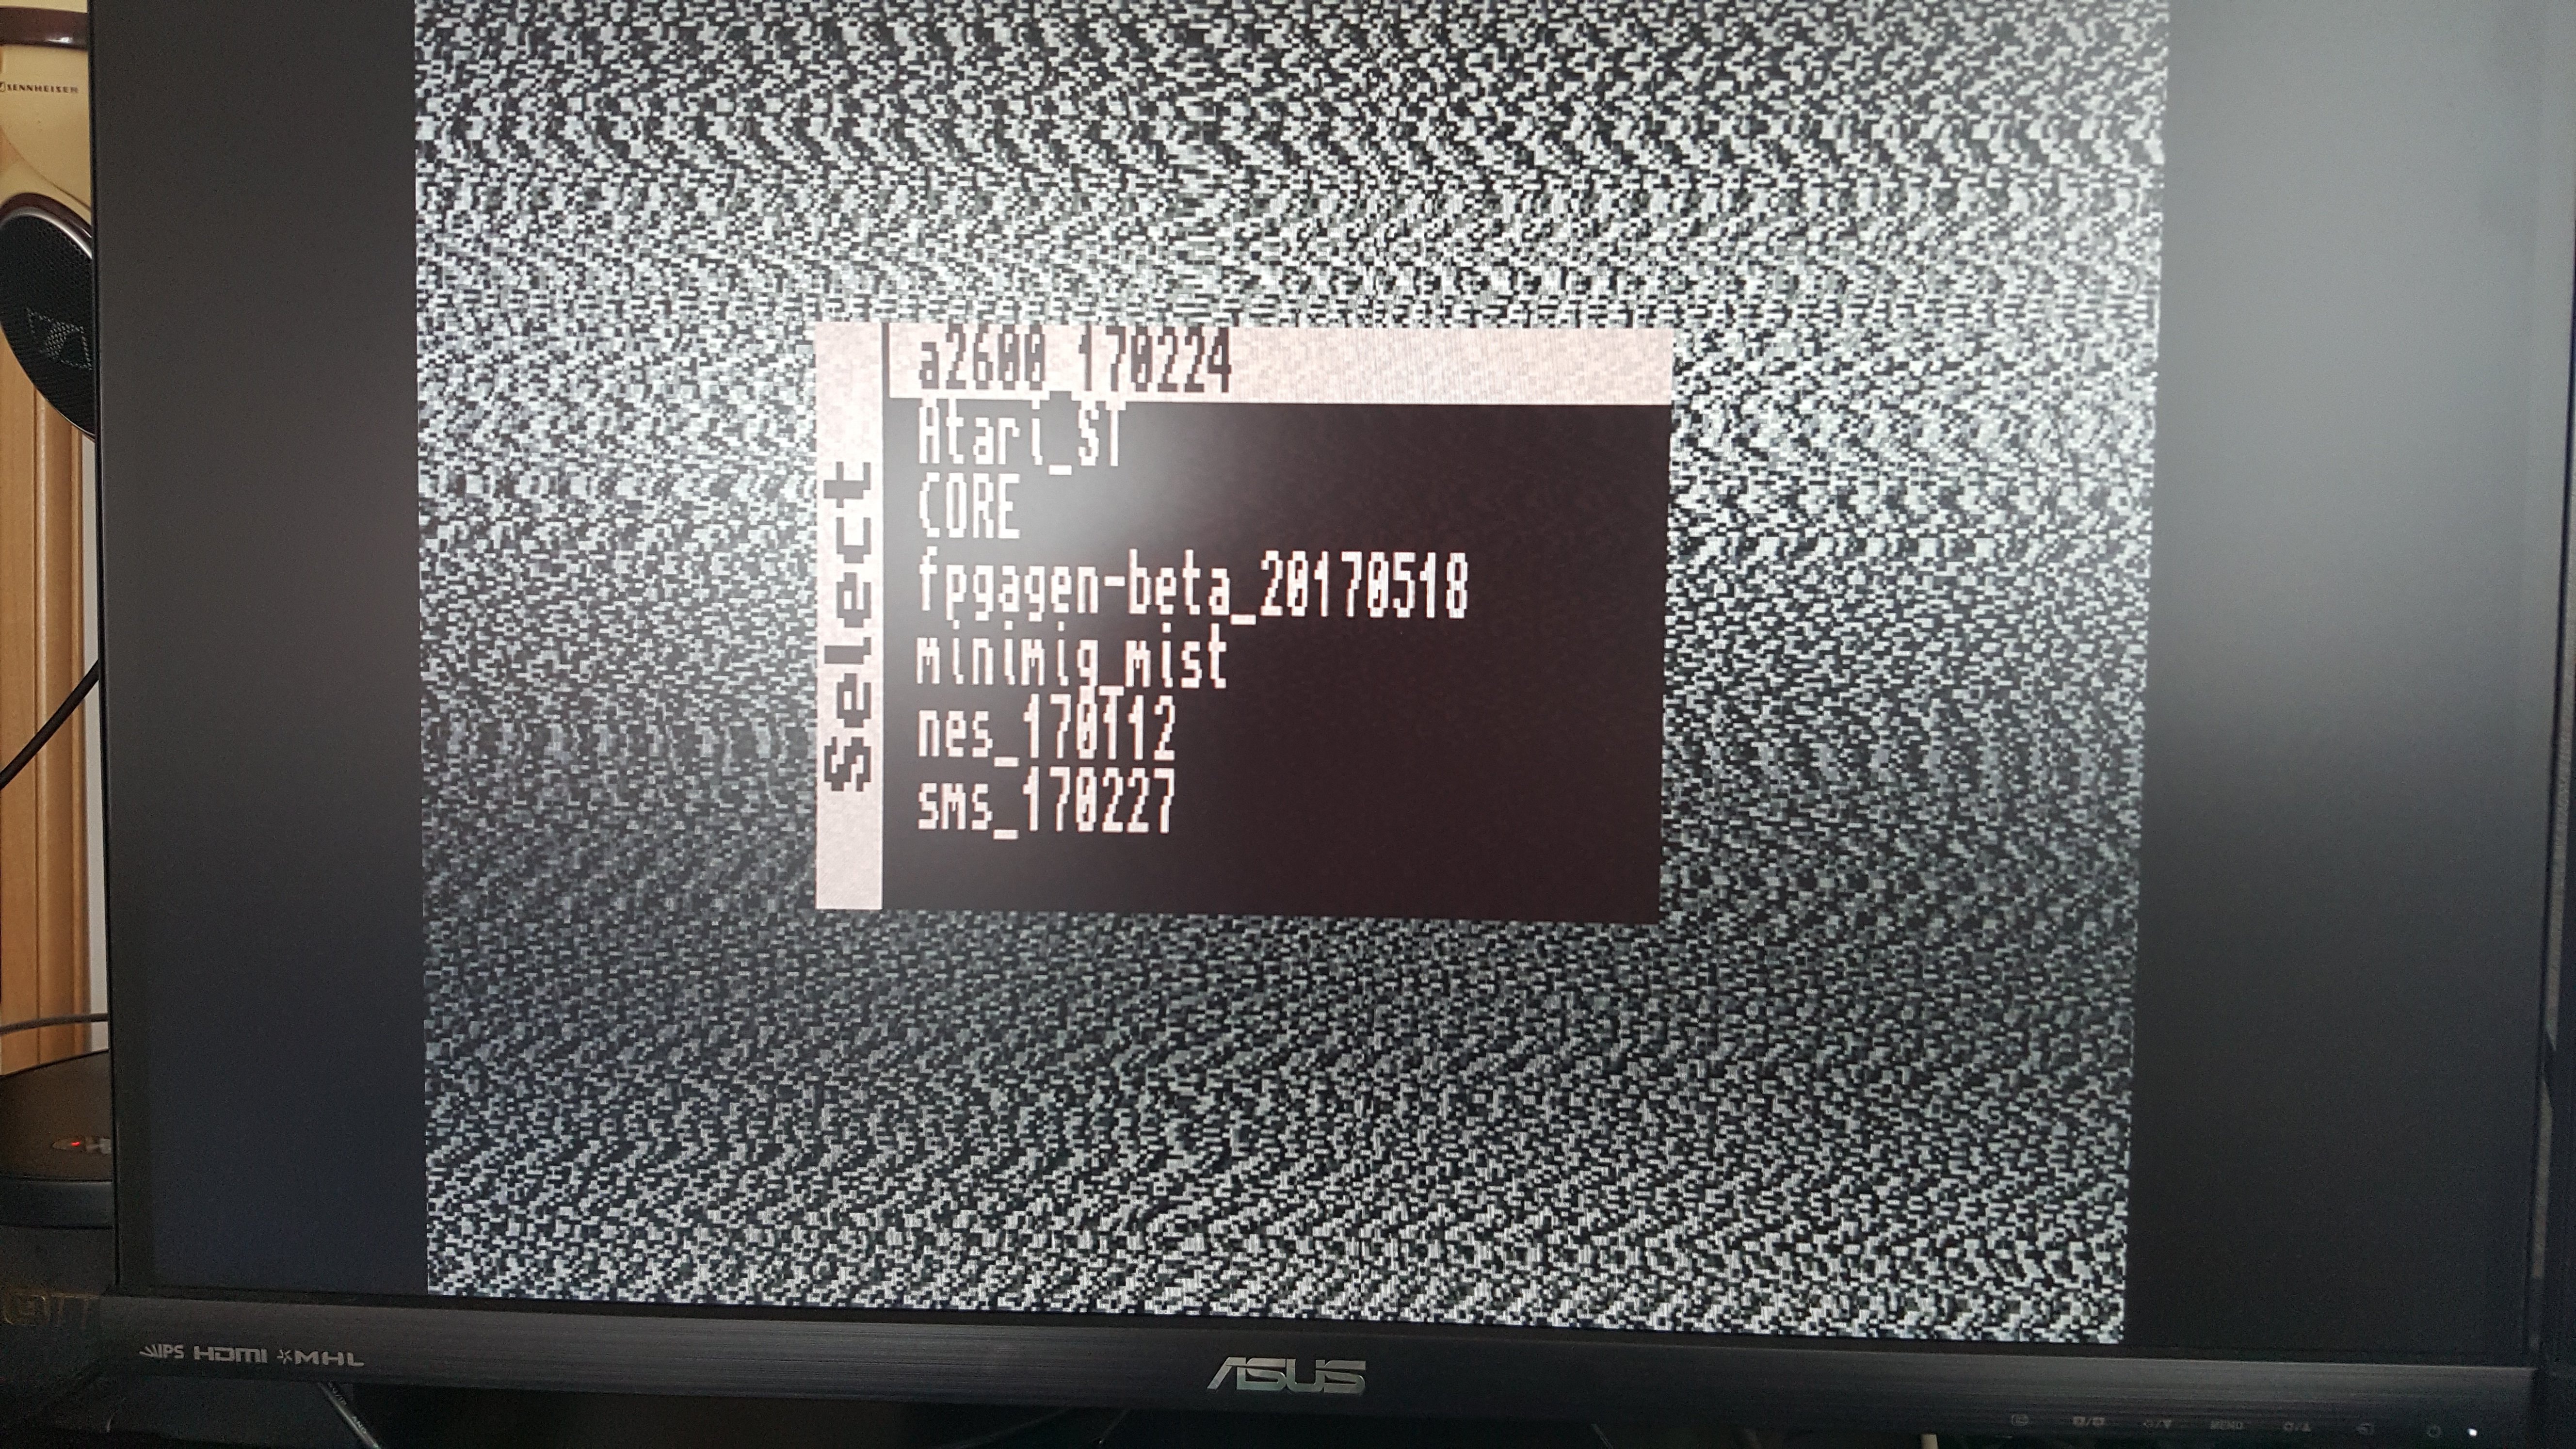
In order to start the MiST you need to choose one core that will be loaded as default. It should be renamed to core.rbf and need to be placed into the root folder of the SD-card. This core will be loaded at first start.
Connect the MiST with the monitor using a vga cable, connect with power source via USB, connect a mouse , a keyboard, a controller and insert the prepared SD card. Turn on with a power switch on the back side. If something is missing (like correct files or correct SD) the first led will blink 5 times. If everything is ok, than the default core will be loaded.
After the default core is loaded you can access the MiST OSD-menu by pressing F12. From there you can configure the loaded core or load other cores, update firmware and change settings.
If your monitor doesn’t support the video signal from mist, try to change PAL to NTSC or vice versa.
Buttons
- left button (reset): resets the mist
- middle button (OSD-menu): calls the OSD-menu
- right button (user or Core-defined button): the function depends on the core
By pressing the middle button for more than 2 seconds you can toggle between 15KHz and 31KHz modes.
By pressing the middle button for more than 2 seconds and then pressing the right button you can toggle between RGB and YPbPr modes.
Additinal customizing with mist.ini
You can add specific settings at start via a configuration file “mist.ini”. You can see all options on this site.
Controls
OSD-menu
You call the main menu (OSD-menu, F12-menu) by pressing F12, the middle button on the unit or select+start on gamepad.
Keyboard
OSD-menu
- arrows: navigate in menu
- Enter: accept, choose
- ESC: cancel, go back
Sometimes other keys (e.g. Space) can be pressed, see the text in the menu.
Mouse emulation
- arrows: navigate the mouse cursor
Controller
OSD-menu
- A: accept, choose
- B: cancel, go back
- directional buttons: navigate in menu
- L/R/select+up/down: page up, page down
Mouse emulation
If you enable the mouse emulation (by pressing NumLock or holding select on the gamepad), you can do following:
- directional buttons: move the cursor
- L: left click
- R: right click
Controller shortcuts
Using a normal USB-gamepad you can also use following combinations:
- select+start: OSD menu
- start+A: Enter
- start+B: Space
- start+L: ESC
- start+R: F1
You can disable all shortcuts by writing the following line into mist.ini file:
joystick_disable_shortcuts=1
Using joystick
You can use 9-pin joysticks, like those from Atari 2600, Sega Mega Drive, or from Commodore 64, Atari ST, Amiga. You will need to adjust the type of buttons in the game menus. Note, that Player 1 port is the farther one (the right). I’ve tested the 3-button Sega controller and the Atari CX24 joystick, both worked.
Upgrading firmware
Download the latest firmware from this site and rename the downloaded file to firmware.upg. Start the mist with any working core (I’ve also seen mentions about a dummy-core with no functions (only OSD-menu available), but I couldn’t find it anymore) and then use the F12-menu to update the firmware. Scroll with arrow buttons and go to the menu “firmware”. You can check, if the installed firmware is outdated and compare it with the new one.
Installing cores
There is a dummy core, which starts very quickly and only allows you to start other cores. I am not a fan of analog noise, but other option is not available.
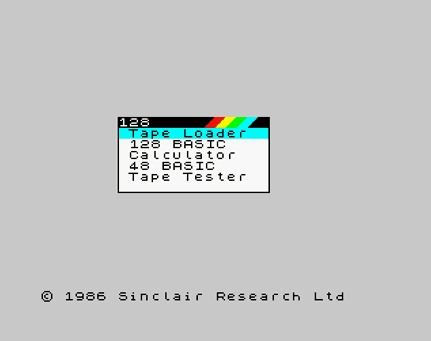
ZX Spectrum
An old 8-bit british home computer with iconic sound and graphics. Was very popular in Europe (UK) and Russia.
You can find the latest core here. Copy it into the root folder of the SD-card. Start the MiST and load this core.
If everything is loaded, you will be greeted with a grey screen and a menu, where you can start games/programmes (Tape loader), tinker with basic language, use a calculator, or some other tools:
 You can load games in formats TRD, TAP and CSW. I’ve only tested the TAP format. Load the tape (TAP), go to Tape Loader and then input Load “”. Actually, the keyboard of the spectrum is full of shortcuts, so that you can’t type the word load as easy, as you think. Press “J”, the word “Load” will be inserted. Then press Shift+P 2 times for that quotation marks. Hit Enter to start loading. The screen will have those multicolored lines and in a couple of seconds (or minutes, if the option Fast tape load is set to off) the game will be loaded. That’s all.
There is also a way to browse and load games from the SD. Consult this page if you want to know more. It worked for me, but I think that the function is too slow.
If you want to see how the games look like, visit this page, it has a couple of GIFs with screenshots.
Commodore 64
C64 is a popular 8-bit home computer with nice graphics for its time.
You will need the corresponding core from this page.
The fastest way to load games is to load the PRG (program) files directly into RAM and then starting with the command “RUN”. The game will be loaded very quickly. You only need to find the initial program and this is not always clearly labeled.
Another supported format is D64. Assign the d64-file to the disk drive from the OSD-Menu and then use commands LOAD “$”,8 or LOAD”*”,8,1 to load them. Then type run to start the loaded games.
This is how the main screen looks like:

Let’s load a D64 game. Press F12 and load the D64 rom.
Then:

and then after a couple of seconds:
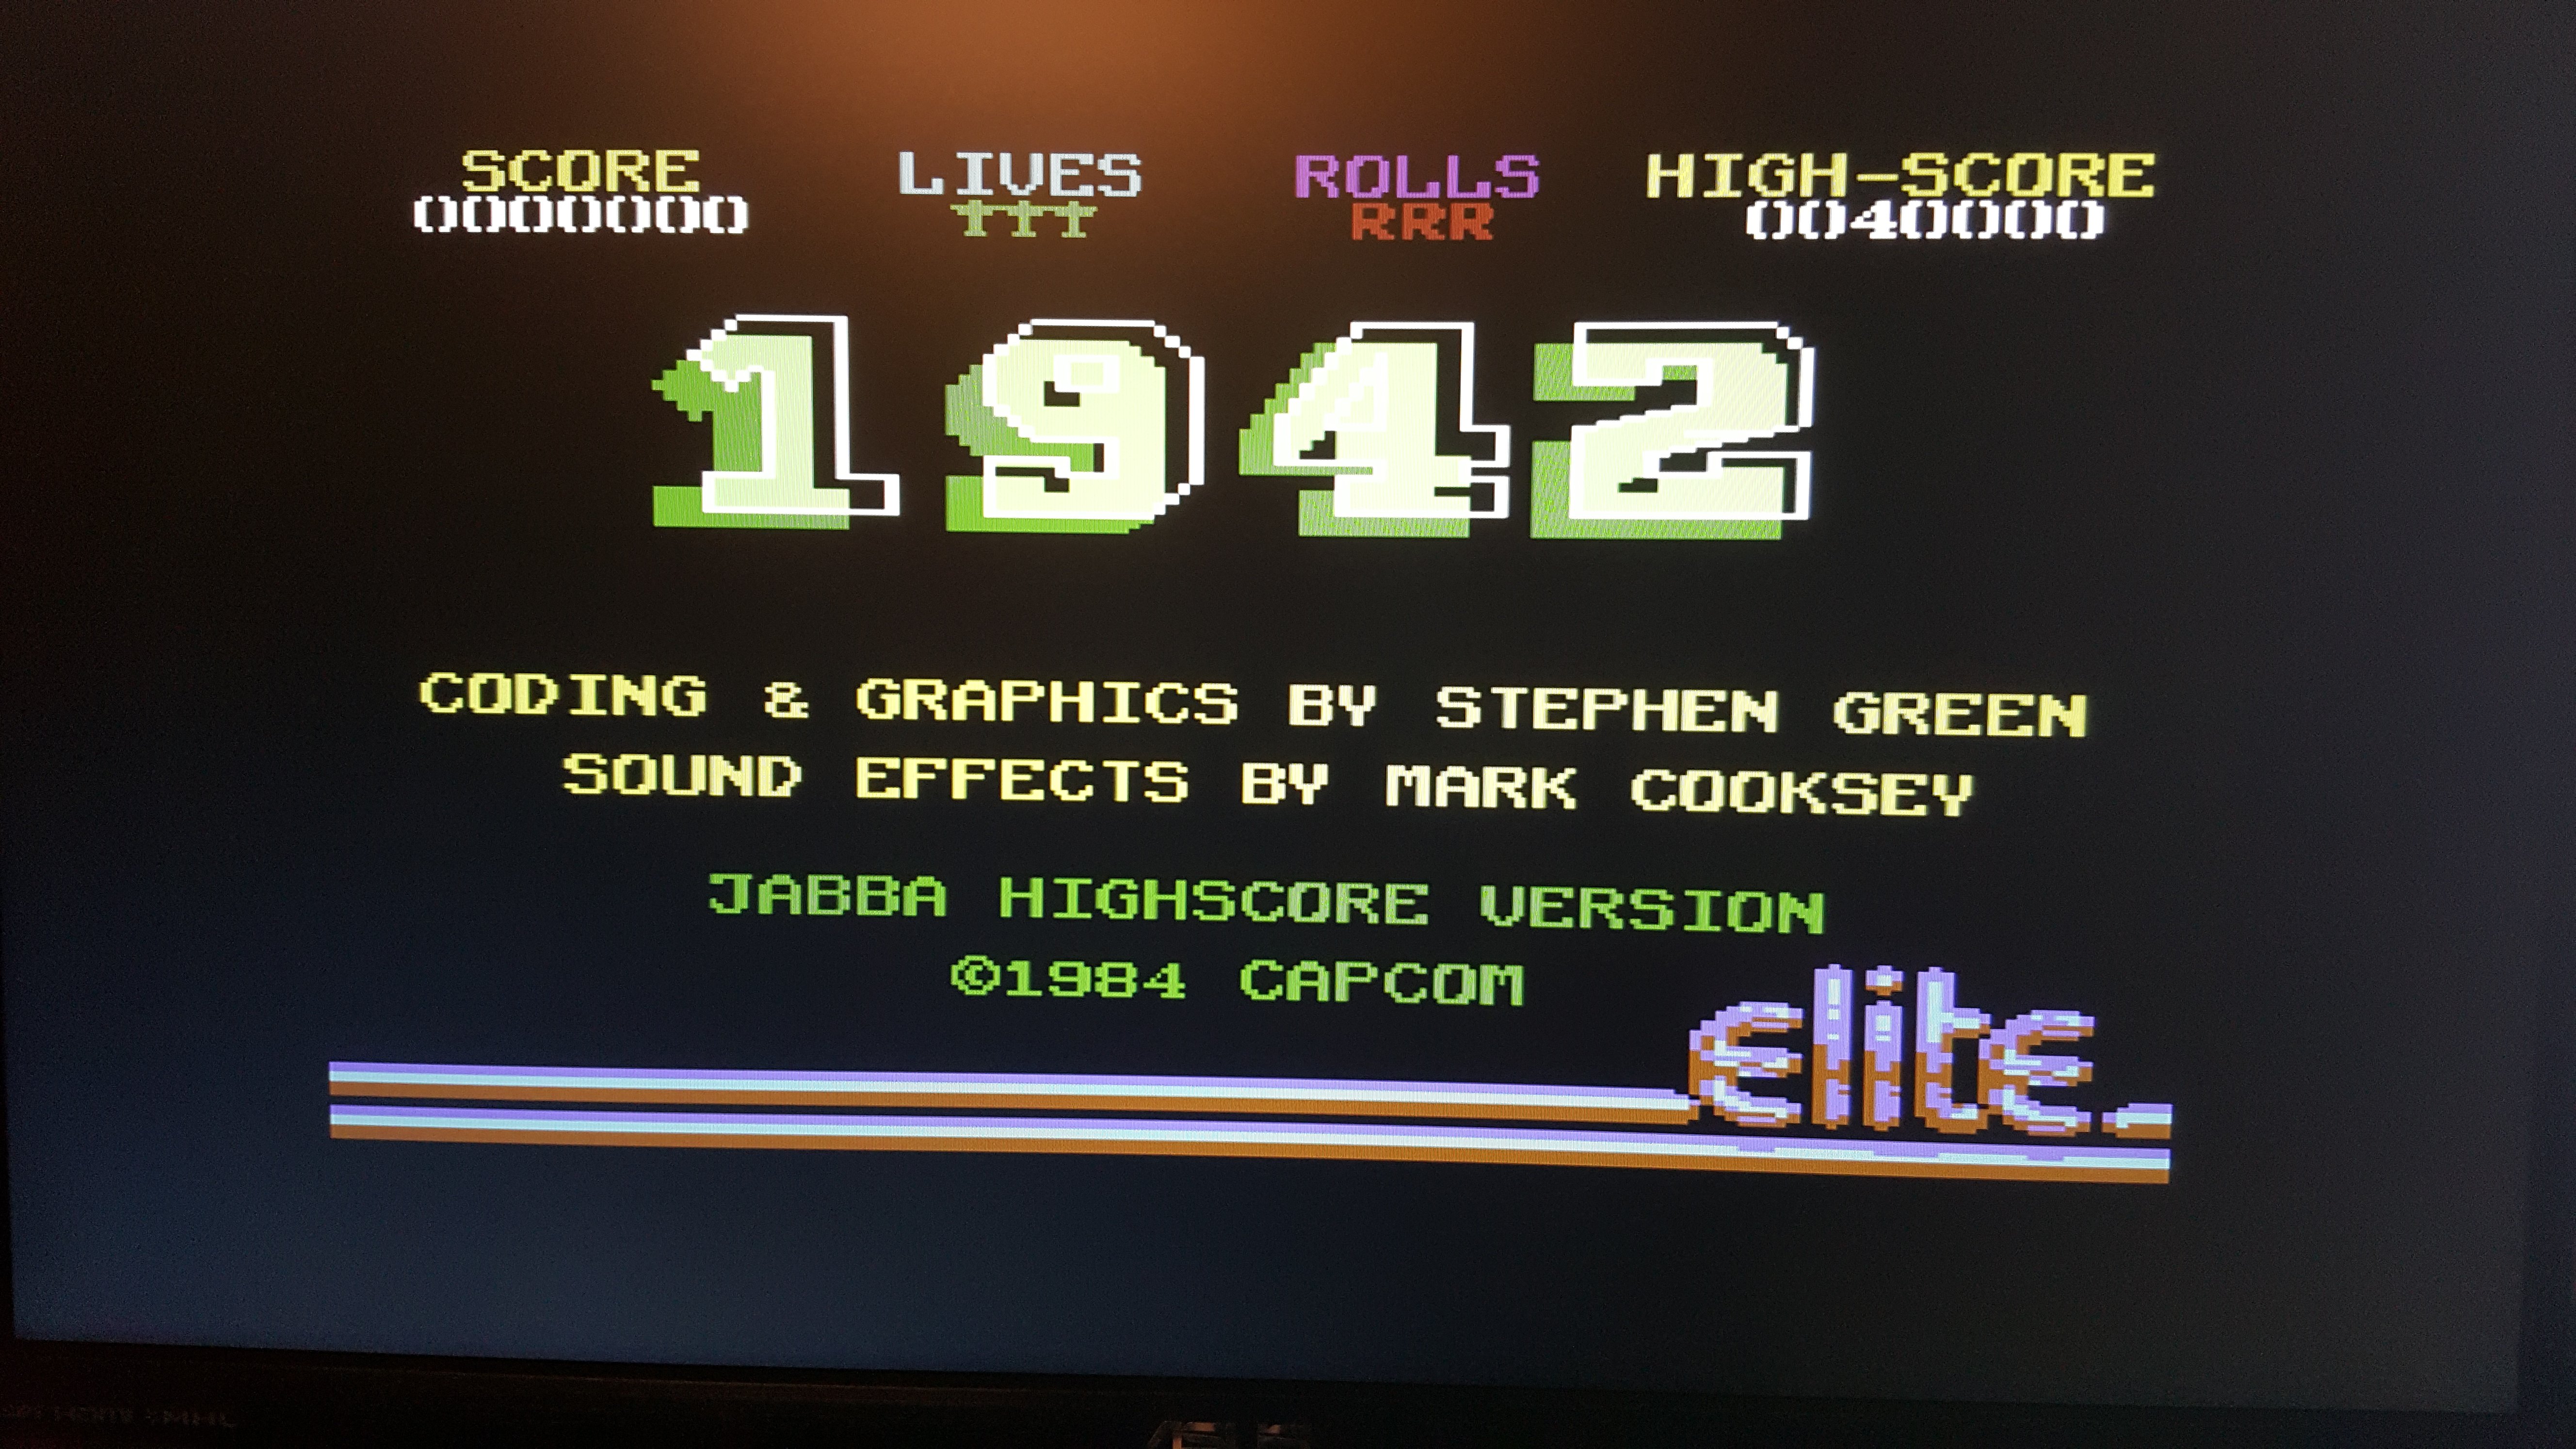
You can reset with F4. If your joystick is not recognised, go to the OSD menu and change Joysticks to “swapped”. Some games (like 1942) need it.
If you don’t have PRG-roms, you can extract them from almost any kind of C64-roms using the application DirMaster. There you have an option to export multiple files in batch. For each export a folder will be created where the PRG-files will be placed.
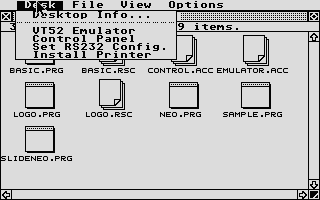
Atari ST
Atari ST is a 16/32-bit home computer, very popular in 90-s with graphics comparable with Genesis and SNES.
You need a core and a tos-image (should be renamed to tos.img). You can also add the default font and use a default floppy image (that will decrease the loading time).
Put all these files into the root folder.
After the core is loaded you can adjust the settings and load applications and games from the OSD-menu. You can also choose the video mode there.
This is how the system looks like after it’s loaded.
B/W
 Colour
To run a game you just need to load a game (rom with extension ST) via the OSD menu and then restart the core via the menu (System->Reset).
Here are some example games (the video is not mine), to give an overall impression:
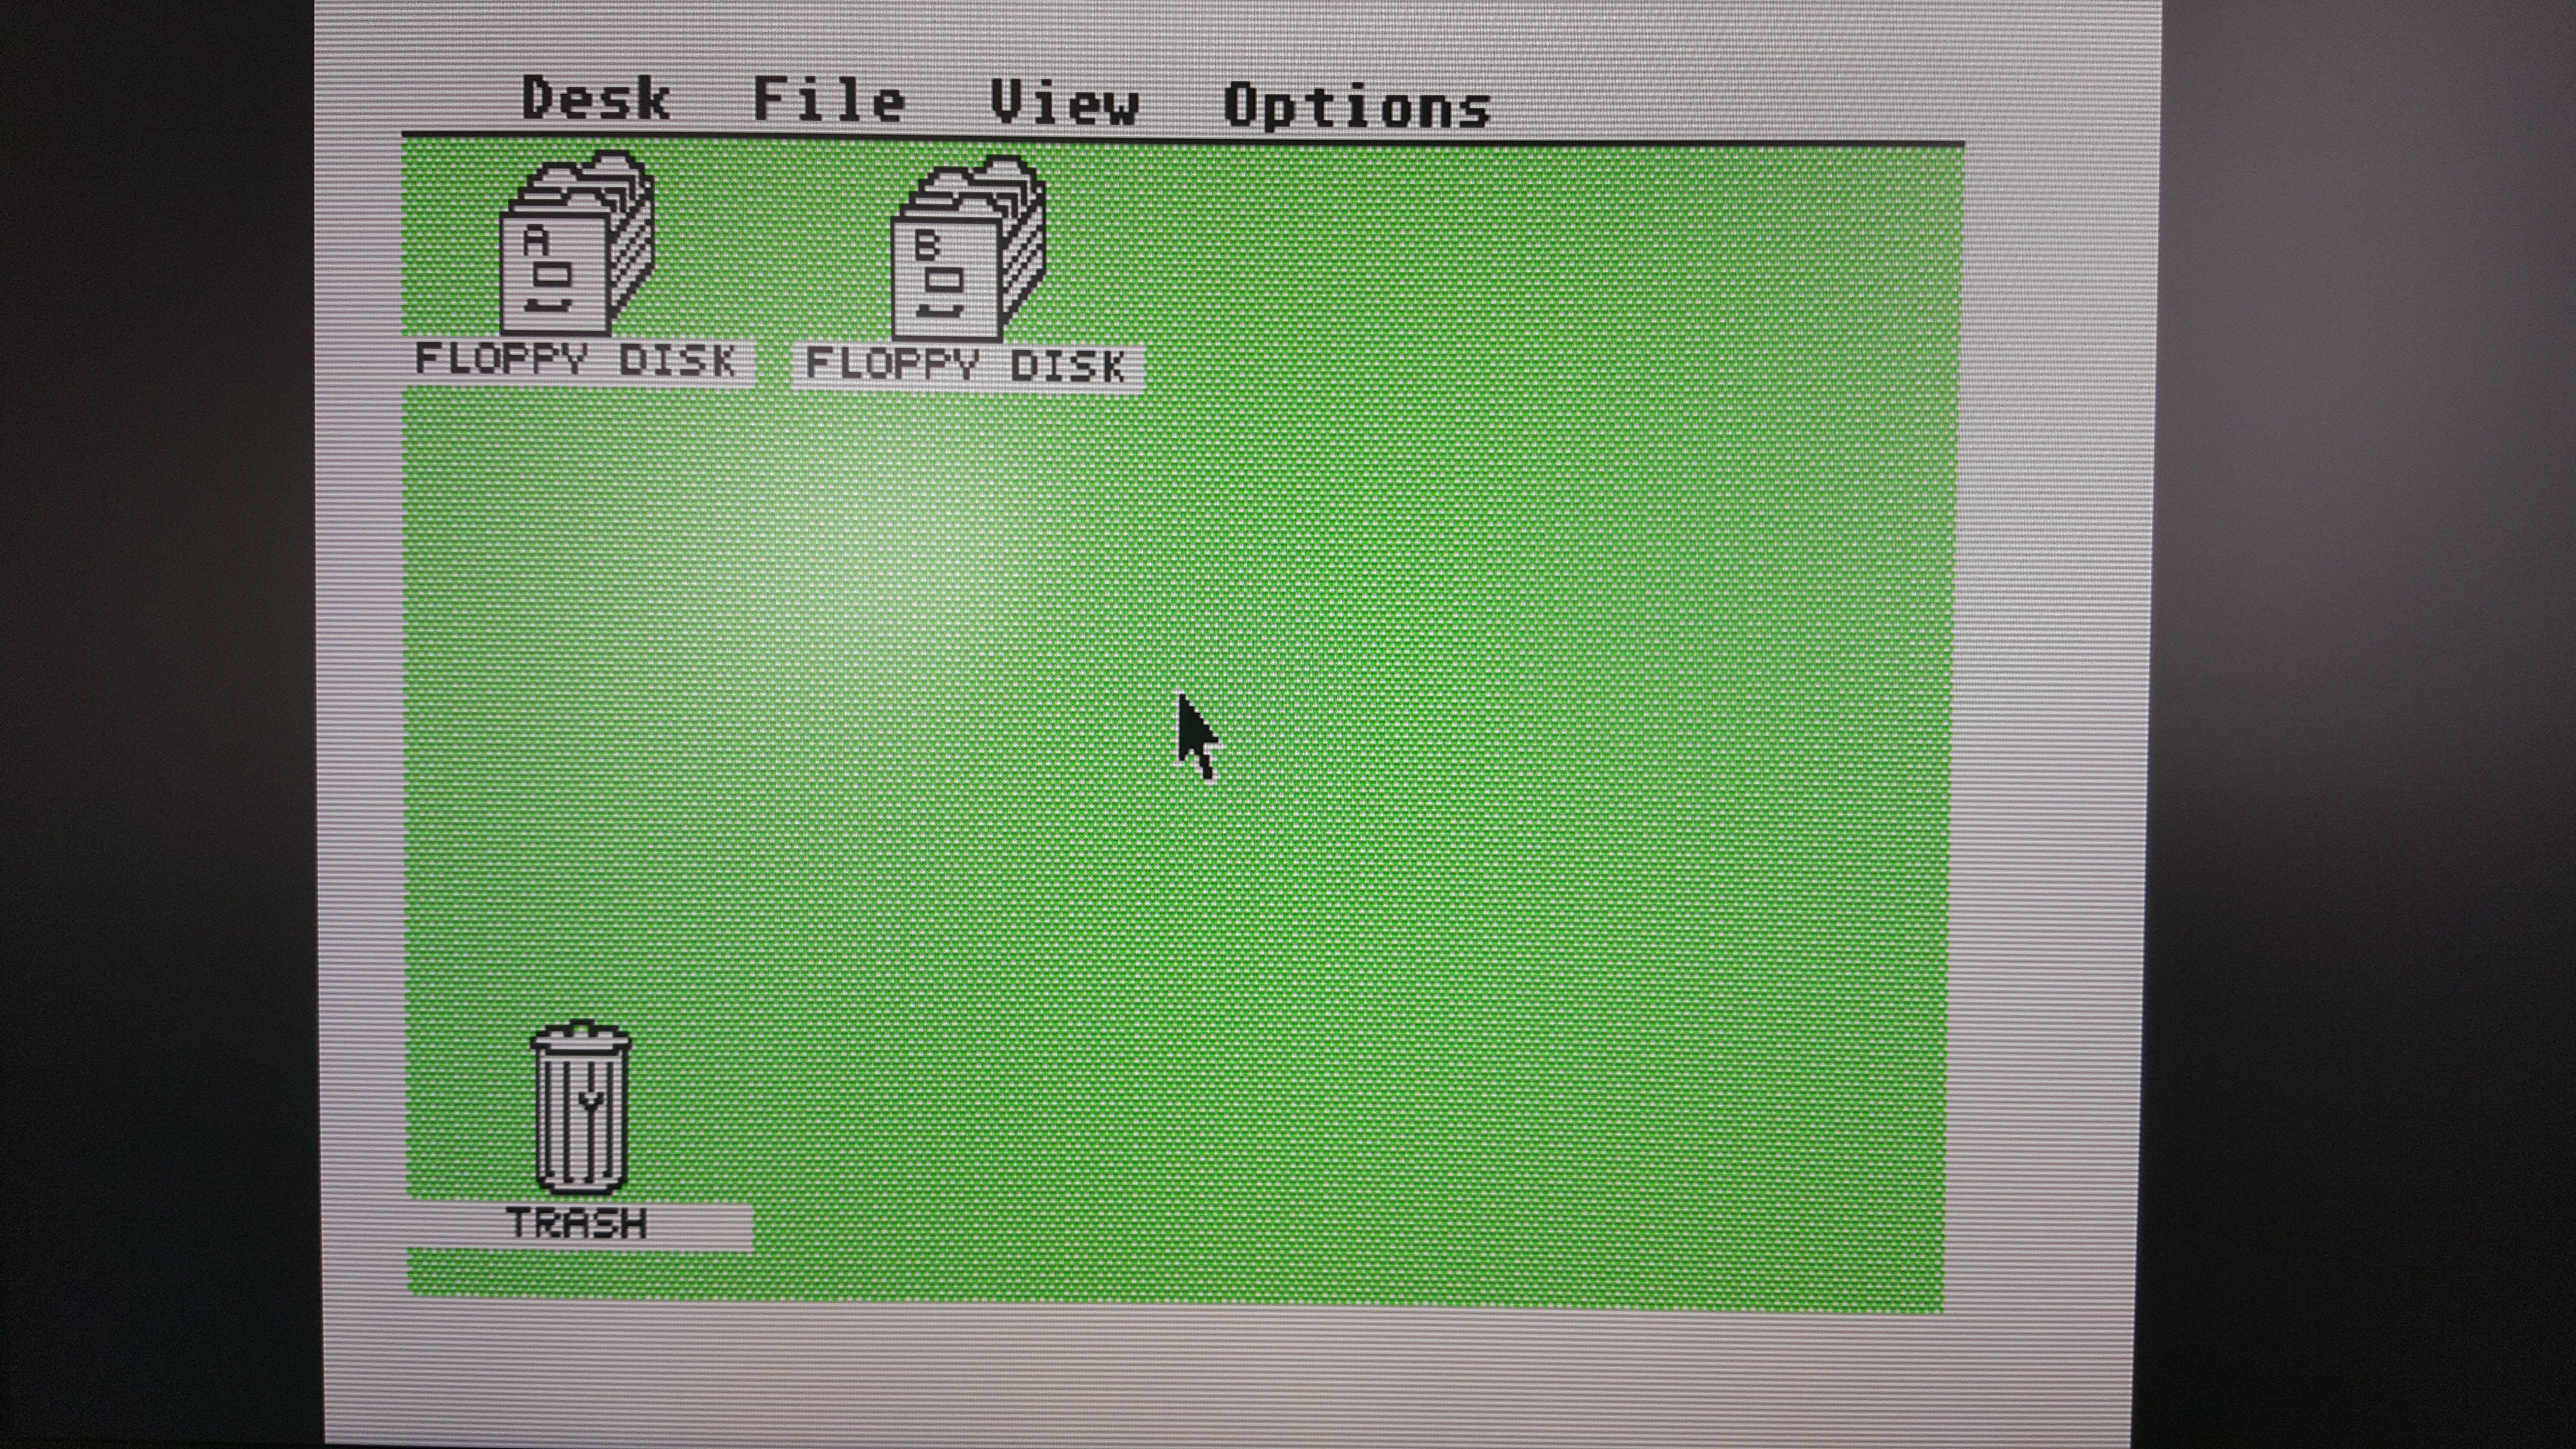
Amiga
Amiga is a 16-bit home computer, very popular in 90-s with graphics comparable with Genesis and SNES.
You need a core and a kickstarter rom. This is the OS-rom, which can be ripped from the original Amiga or downloaded from the internet, or buy it legally from amiga forever (they also have a cheap android app with basic kickstart roms). You can take the version 1.3, 2.3 or 3.1, for instance. I suggest using a kickstart rom which is intended for your region. This will reduce compatibility problems with video modes. You can also add some menu files (minimig.art, minimig.bal, minimig.cop) for better splash screen or animations. After the core is loaded you can load games from any folder as *.adf files. Just assign the rom and wait for 5 seconds. The game will be loaded. If you want to change the game, it’s better to restart the core.
Put the core, the kickstarter and optional files into the root folder. Roms can be placed elsewhere.
In the settings (open with F12) you can adjust the hardware type, memory type, input settings, video settings, etc.
These are the setting I am using for game loading only (no workbench):
Floppy disk turbo: on
Chipset settings:
- CPU: 68020
- Turbo: none
- Video: PAL
- Chipset: AGA
- CD32Pad: Off
Memory Settings:
- Chip: 2.0 MB
- Slow: none
- Fast: 24.0 MB
- ROM: Kickstarter 3.1 40.068 (from Amiga Forever)
- HRTmon: disabled
Video settings:
- Lores Filter: none
- Hires Filter: none
- Scanlines: off or dim (scanlines are really good!)
- Dither: off (I can’t see any difference)
A am not familiar with Amiga at all, therefore I won’t be explaining how the operating system works, or how to install applications. I will update this section after I research more.
You can install workbench on virtual hard drive and let the core start with it. You will need to create (using Winuae) or get a hard disk image and then you need to format it with HDTools of the workbench on the mist (not with Winuae!). After that you can install the workbench on this hard drive from floppy drives. This is fairly easy, just follow the instructions on this site. I’ve found an empty hard disk image, ready to be used and 4 GB big here. Follow the instructions, resize it, make bootable and format it. Then install the workbench using install disks on this hard drive. After that you will have a bootable hard disk on your Mist. If you don’t want the mist to start with it, just save it as a non default preset. I am using a kickstart only Amiga as default preset and the hard drive version as preset 1.
My settings are:
- Default: only 3.1 kickstarter
- 1: Kickstarter 3.1 40.68 + Workbench 3.1 40.02 + 4 GB Hard disk
- 2: Amiga Dos + 4 Gb Hard disk
I should be able to install applications or WHDL-games on my preset 1, but I don’t know how to do it yet.
Workbench
Let’s see, what the Workbench offers:
If you have the workbench installed, your Amiga will load it from the hard drive and you see the desktop with the Ram Disk and the Hard drive (mine is called Amiga).
 Clicking one time on an element will select it. From now you can also hold the right mouse button to show the context menu (above). It will be only visible as long as you are holding the right button!
You can also open disks with double click. On the screenshot above I’ve opened my Amiga Hard Drive with the pre-installed workbench. As you see, there are some options there. There are some interesting things to do here. You can adjust the time, the sound, the screen mode, etc. For instance, the default number of colors are 4, but you can go to “Prefs”->”Screen Mode” and change that to 256 and also review the resolution. You can even draw your own pointer!
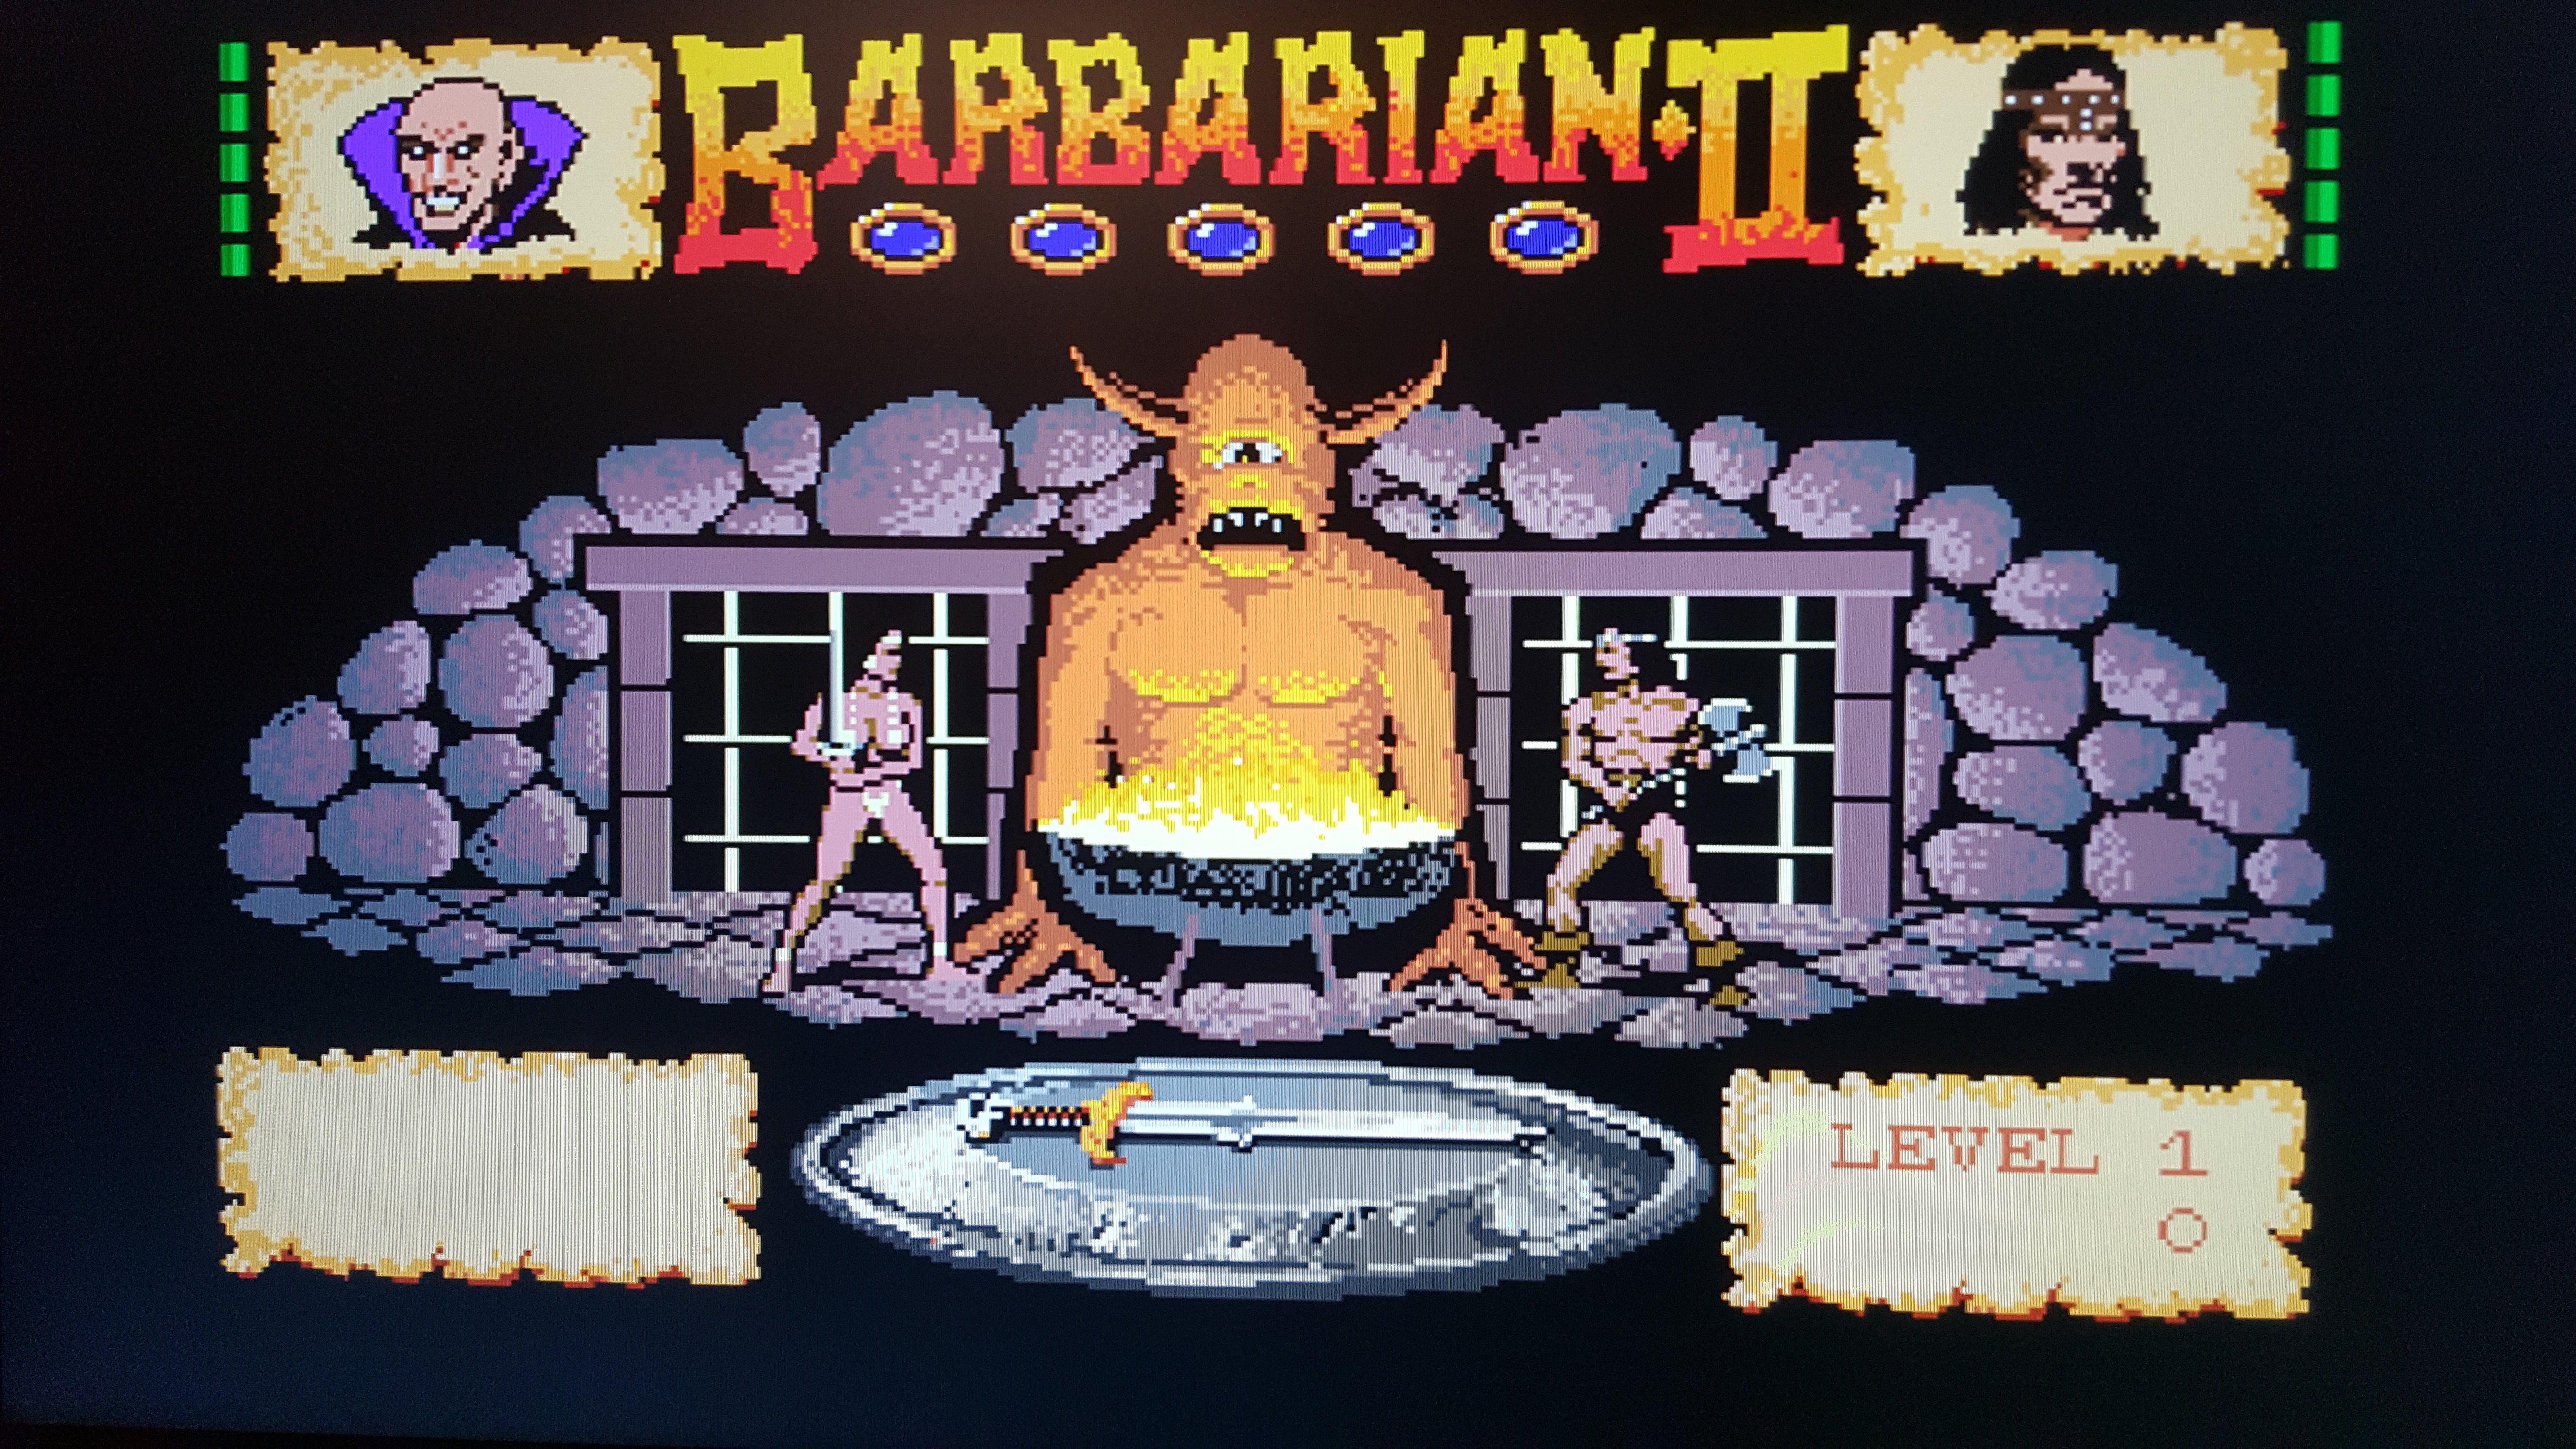
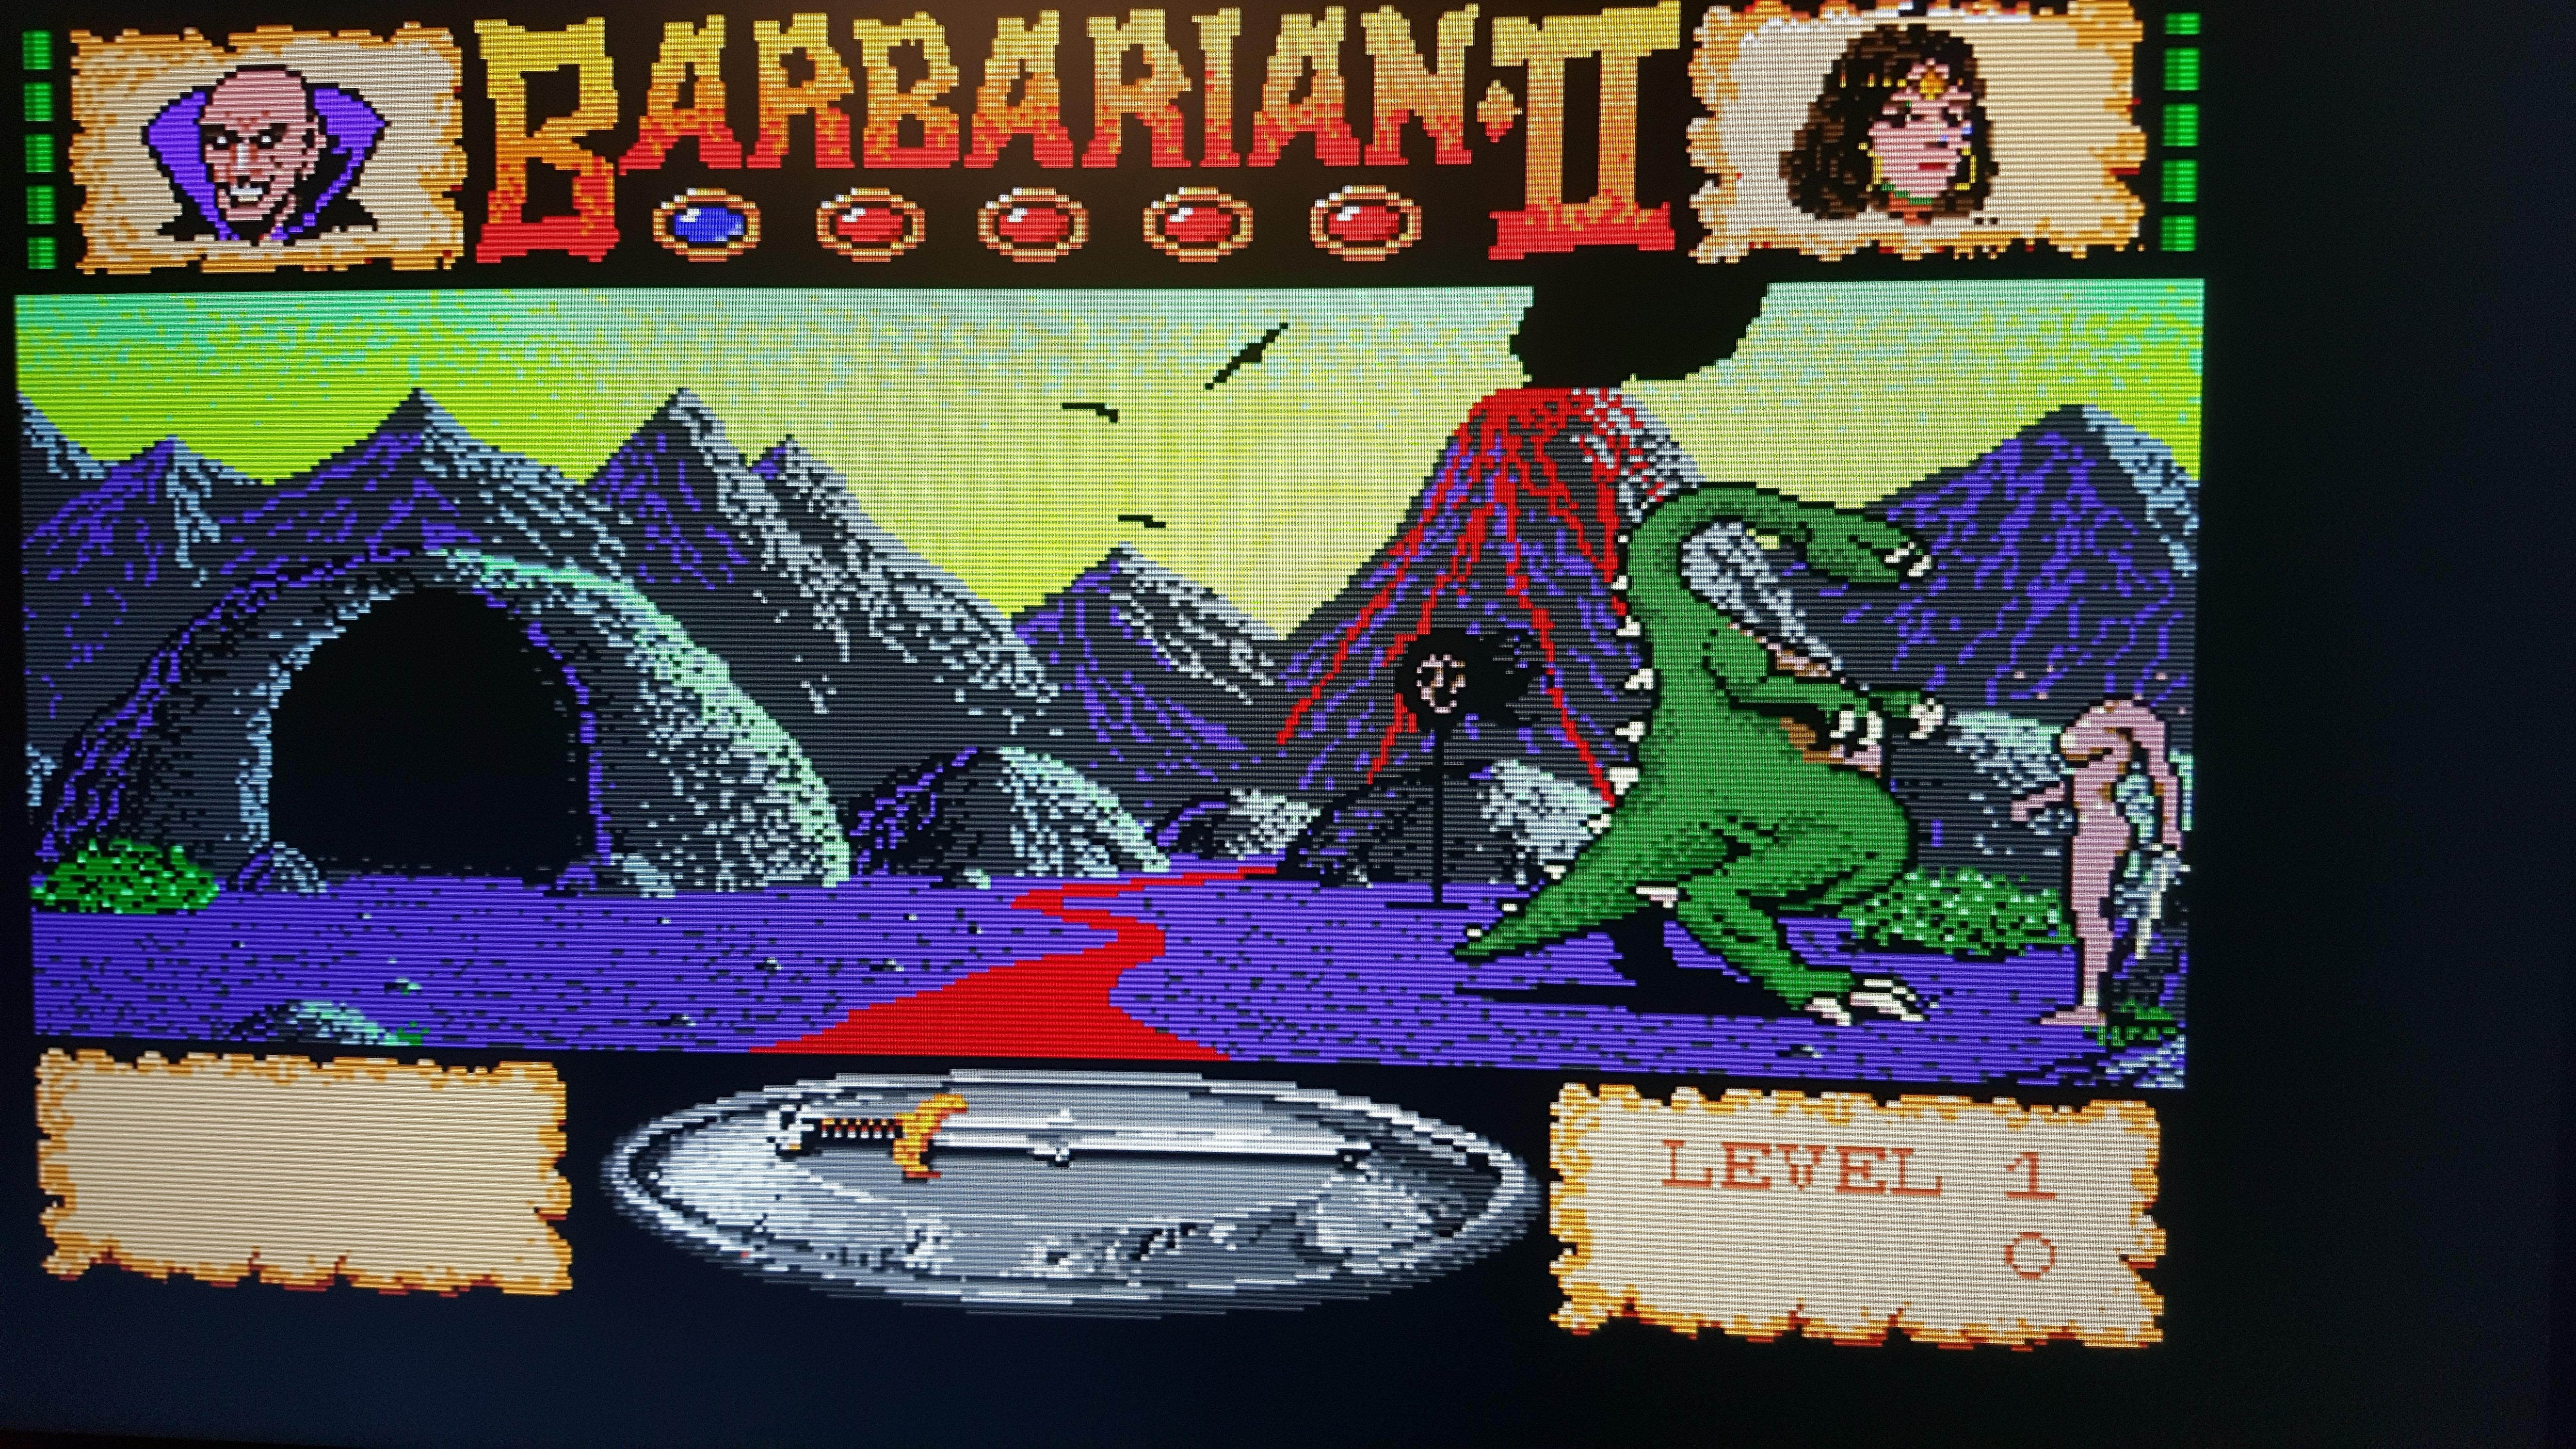
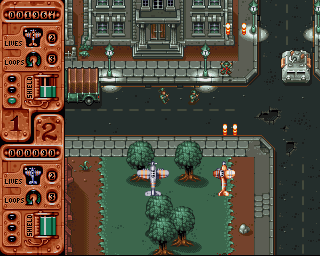
Here is an example of a game for Amiga (not real life screenshot), just so that you can see, what kind of graphics it can have.
In order to play games, you will need to have a keyboard, a mouse and a controller. Some games can only be played with keyboard and mouse, other recognise controller as well. I am still not sure, how to start, pause or quit games. Sometimes you need to press space, other times enter, sometimes only left click will get you further or left CTRL-button.
My observations:
- To load a game, go to the OSD menu (F12 or Context Menu button on the keyboard), then choose the rom into the df0: slot. The game will start. If during the game another disk should be inserted, you can use the second slot (df1:). To load another game, it would be better to reset the core.
- Ingame, you can pause with the key “P”. In “Banshee” I also noticed that I can pause with any letter button, but to unpause I need to press “P” again.
- To proceed, try Space, Enter or left click on the mouse, or right CTRL.
- Right CTRL (and sometimes right Alt) is used as fire button.
- With Esc you can exit the game.
- If Sega Mega Drive controller is used, button B is used as fire button. Button C as the second action button.
- If Atari joystick is used, all buttons are used as fire buttons (so, there is no possibility to do loops in “Banshee” with this joystick).
- You can install applications on your virtual hard drive. E.g. Paint Deluxe disk has an installer with which you can install the application on your Amiga.
- Add all four disk drives and save the setting as default. There are many games, which require a lot of disk swapping. In oder to start Dune 2 you have to swap multiple disks for many minutes.
NES
The core is not 100% done and the compatibility is very limited. Many roms work fine though. You only need the core and you can load games from *.NES files from any folder. Saving is not supported yet.
Put the core into the root folder.
As I already mentioned, there are perfect fpga-clones out there and perfect reimplementation is theoretically possible.
You can adjust settings in the OSD-menu. E.g. enable/disable scanlines, hq2x filtering, change the palette and some other. You can use the keyboard or your controller in the menu.
I’ve done a real test with NES core and FPGA Mist v1.3. Core nes_170112.rbf.
In this video I used european roms and as you can see most games run well but some had issues: first Battletoads is very laggy, Battletoads and Double Dragon has also slowdowns. I did another test after this vide and some games are affected by strange lines (Adventure Island, e.g.) and flickering (Bomberman) and what helps is enabling the cropping of the overscan. The image is a bit smaller on both sides but it improves the picture. The issues with both Battletoads are because of roms (the same problem appears on the original hardware!). This all applies, if you play european roms.
I guess the core is the reimplementation of the NTSC NES (US), that is why you need to use NTSC-roms to get best results. European roms often have issues where NTSC run perfectly. Check the next video, where european Battletoads have issues and NTSC gameplay is perfect. I checked all games, which had issues when I used european roms and they play perfectly in NTSC version. None of tested NTSC games had any issues, but I haven’t tested them all.
Here ist another video, taken with the XRGB Mini Framemeister. I used a cheap VGA->HDMI converter and the connection had issues, which are absent if the normal VGA cable is used. Therefore there are sporadic video and audio glitches, but they are only because of the VGA-HDMI converter.
A small notice: it’s impossible to connect FPGA MiST with Elgato or newer monitors directly, because they don’t recognise the signal output by most cores. There is just no picture, no connection. You have to use some sort of upscaler like XRGB Mini.
I didn’t manage to create a controller profile with turbo buttons. I only managed to remove that control type, where the upper button (Y) is used to press UP.
There is one missing feature with this core: no saving is possible. Not even the original saving with batteries. I am glad, that most games don’t have savings or use passwords, but games like Zelda will not be fully playable, until this feature is implemented. Theoretically possibilities like with AVS or even Analogue NT would be possible (except outputs and support for cartridges), but there is no one, who could implement it.
Really good looking scanlines (better than on AVS and Retro Reak).


Conclusion: I consider this core one of the best. The best thing about this core is how low the lag is. I can see a big difference, comparing it with the NES Mini, Retropie or Retro Freak. Not to mention original consoles via AV on modern TVs, which have huge delays. The controls are perfect and the lag is minimal. The picture quality for NTSC is very good, but more settings would be also great (like aspect ratio or zoom). I also very like the implementation of scanlines, although sometimes they are too dark. All in all, it is a very playable version.
Sega Master System
You only need the core. Put the core into the root folder. In the F12-menu you can make some adjustments. The core is pretty limited though.


I couldn’t start some games (Alien 3, Alien Storm). Other had sound issues, the music was slightly off the tune.
Atari 2600
You only need the core. Put the core in the root folder and load games from the F12-menu.
The core has nice interface with floating text.
You can play with a controller, but I’ve also played with a joystick. One big problem is that some games use non-supported video outputs. It doesn’t necessarily has to do with the rom region. You start such games and the monitor is showing, that the range is out. Try to start roms, which are compatible with the chosen video standard (I am using NTSC mode and NTSC or U roms).
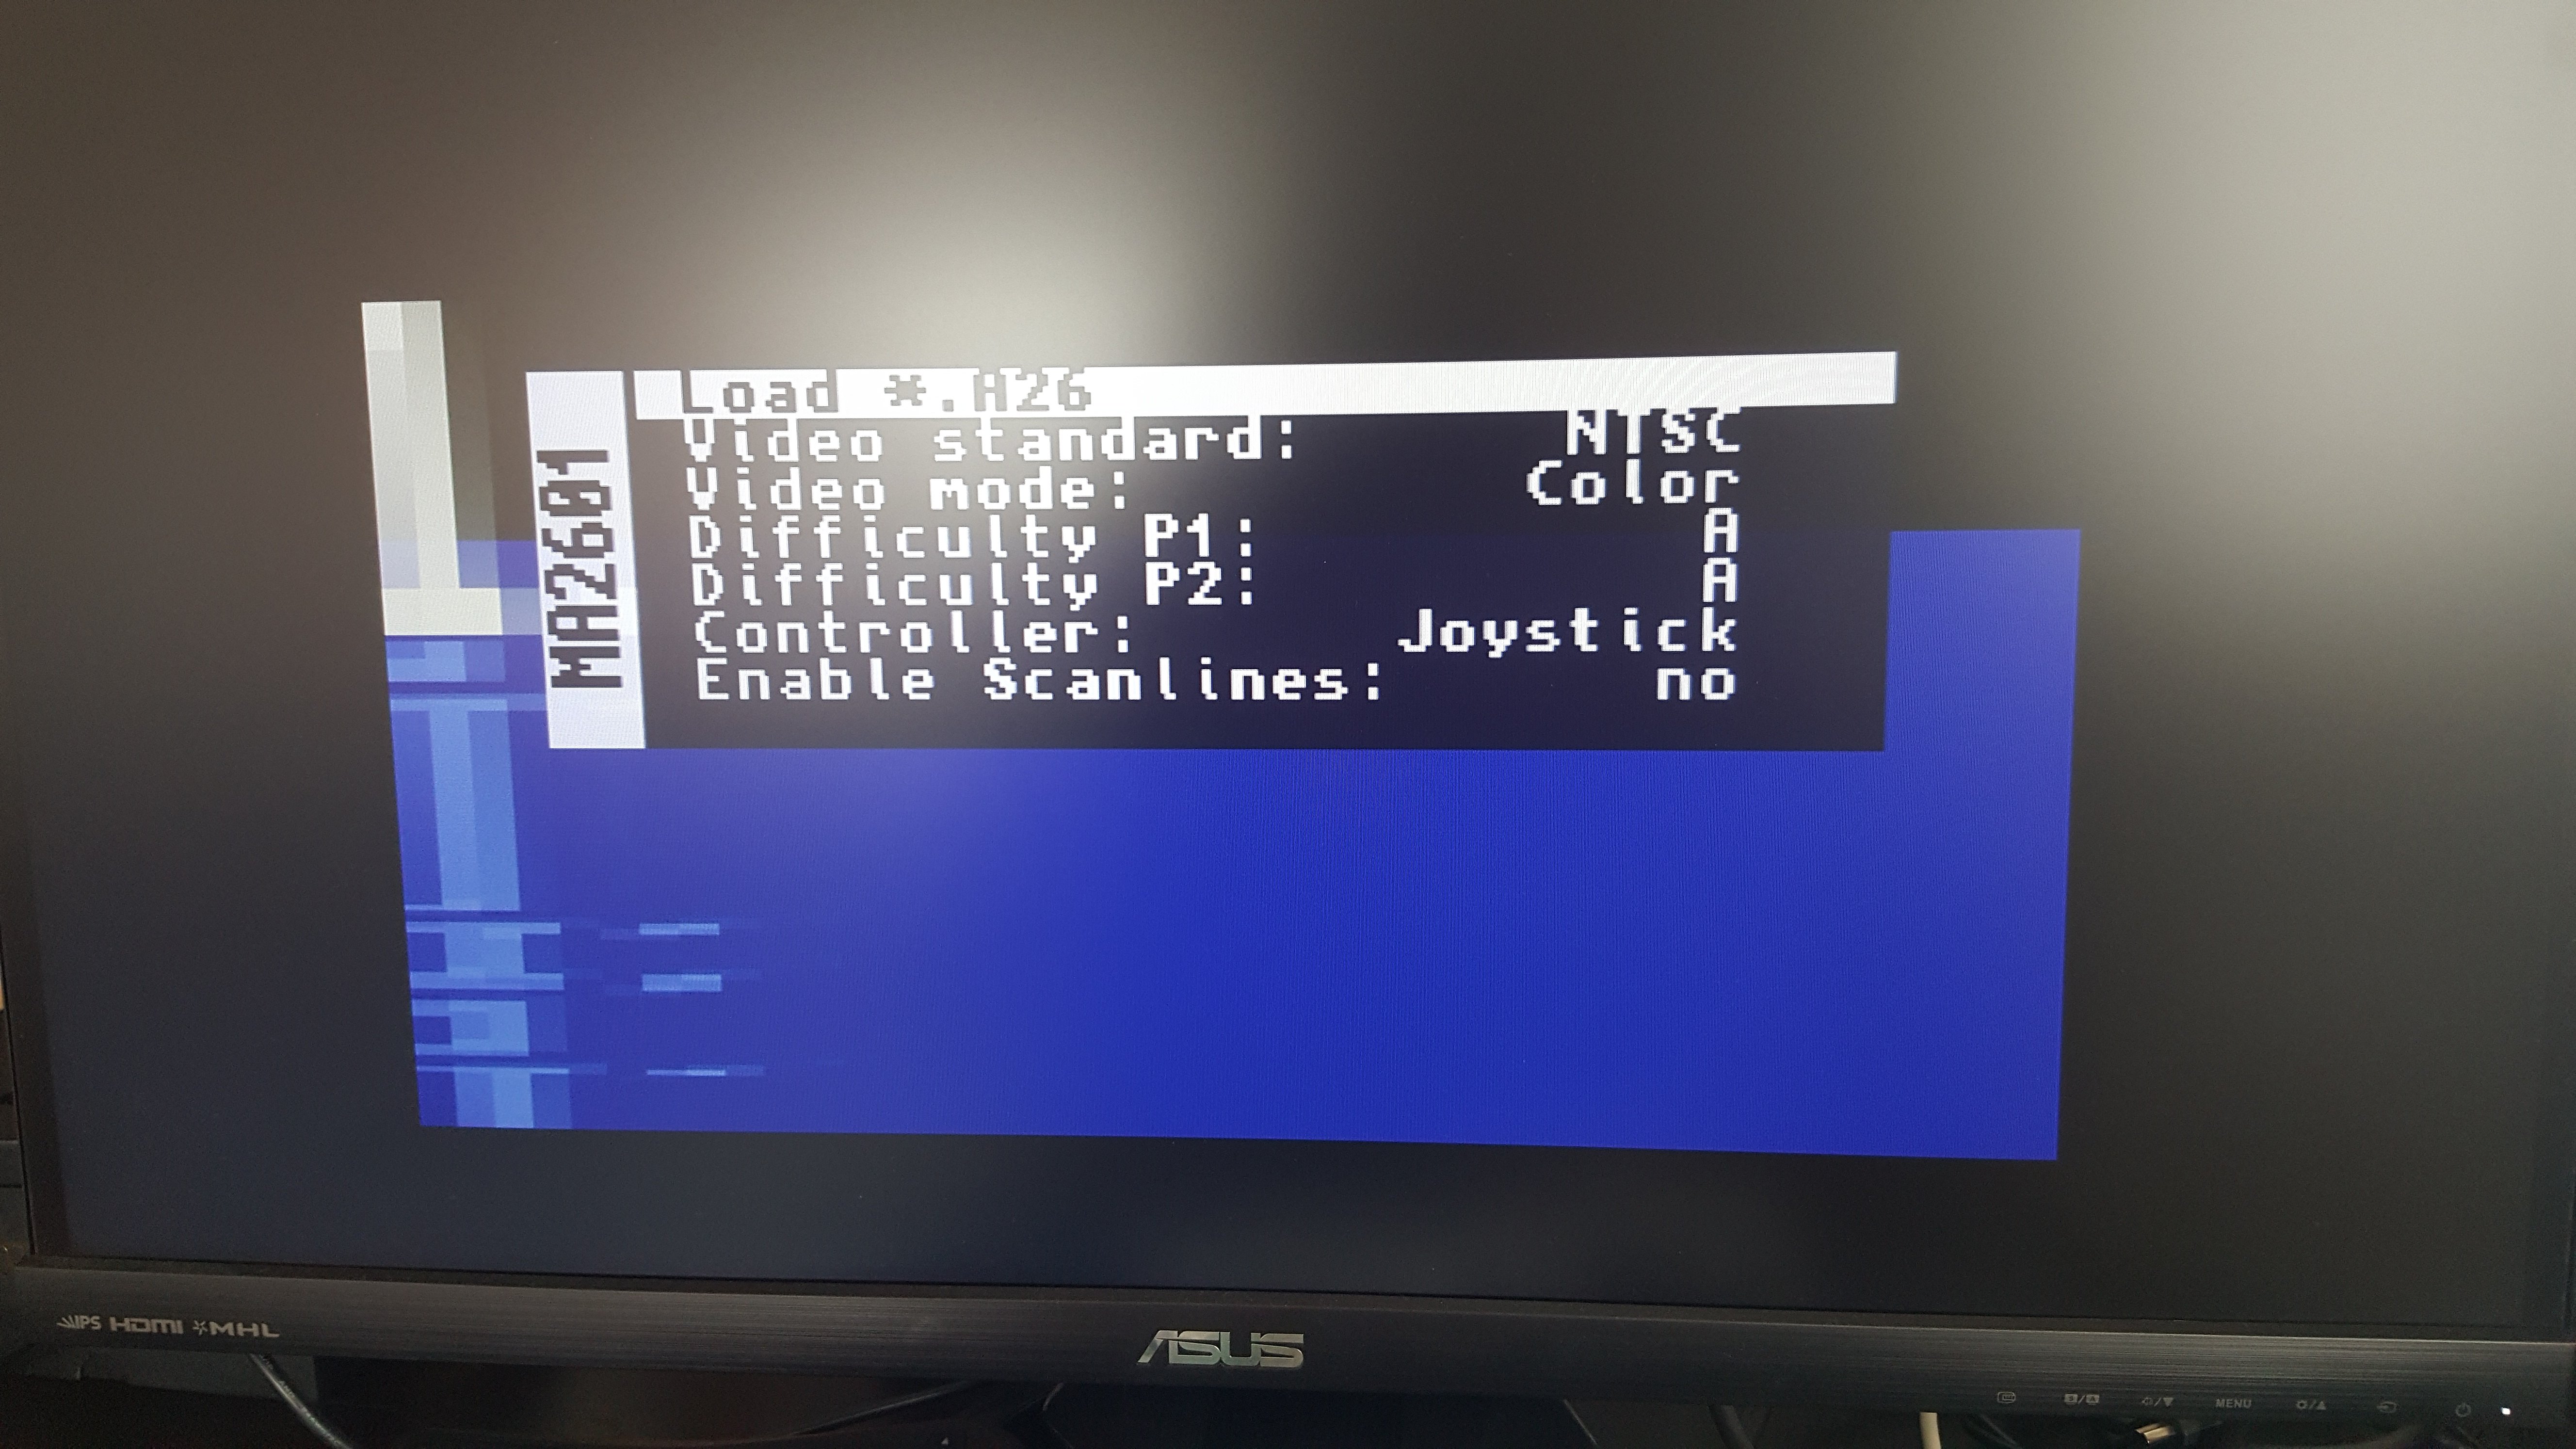 All games I tried, run without problems. The picture is really good. If you choose the video standard NTSC, make sure your loaded games match this region.
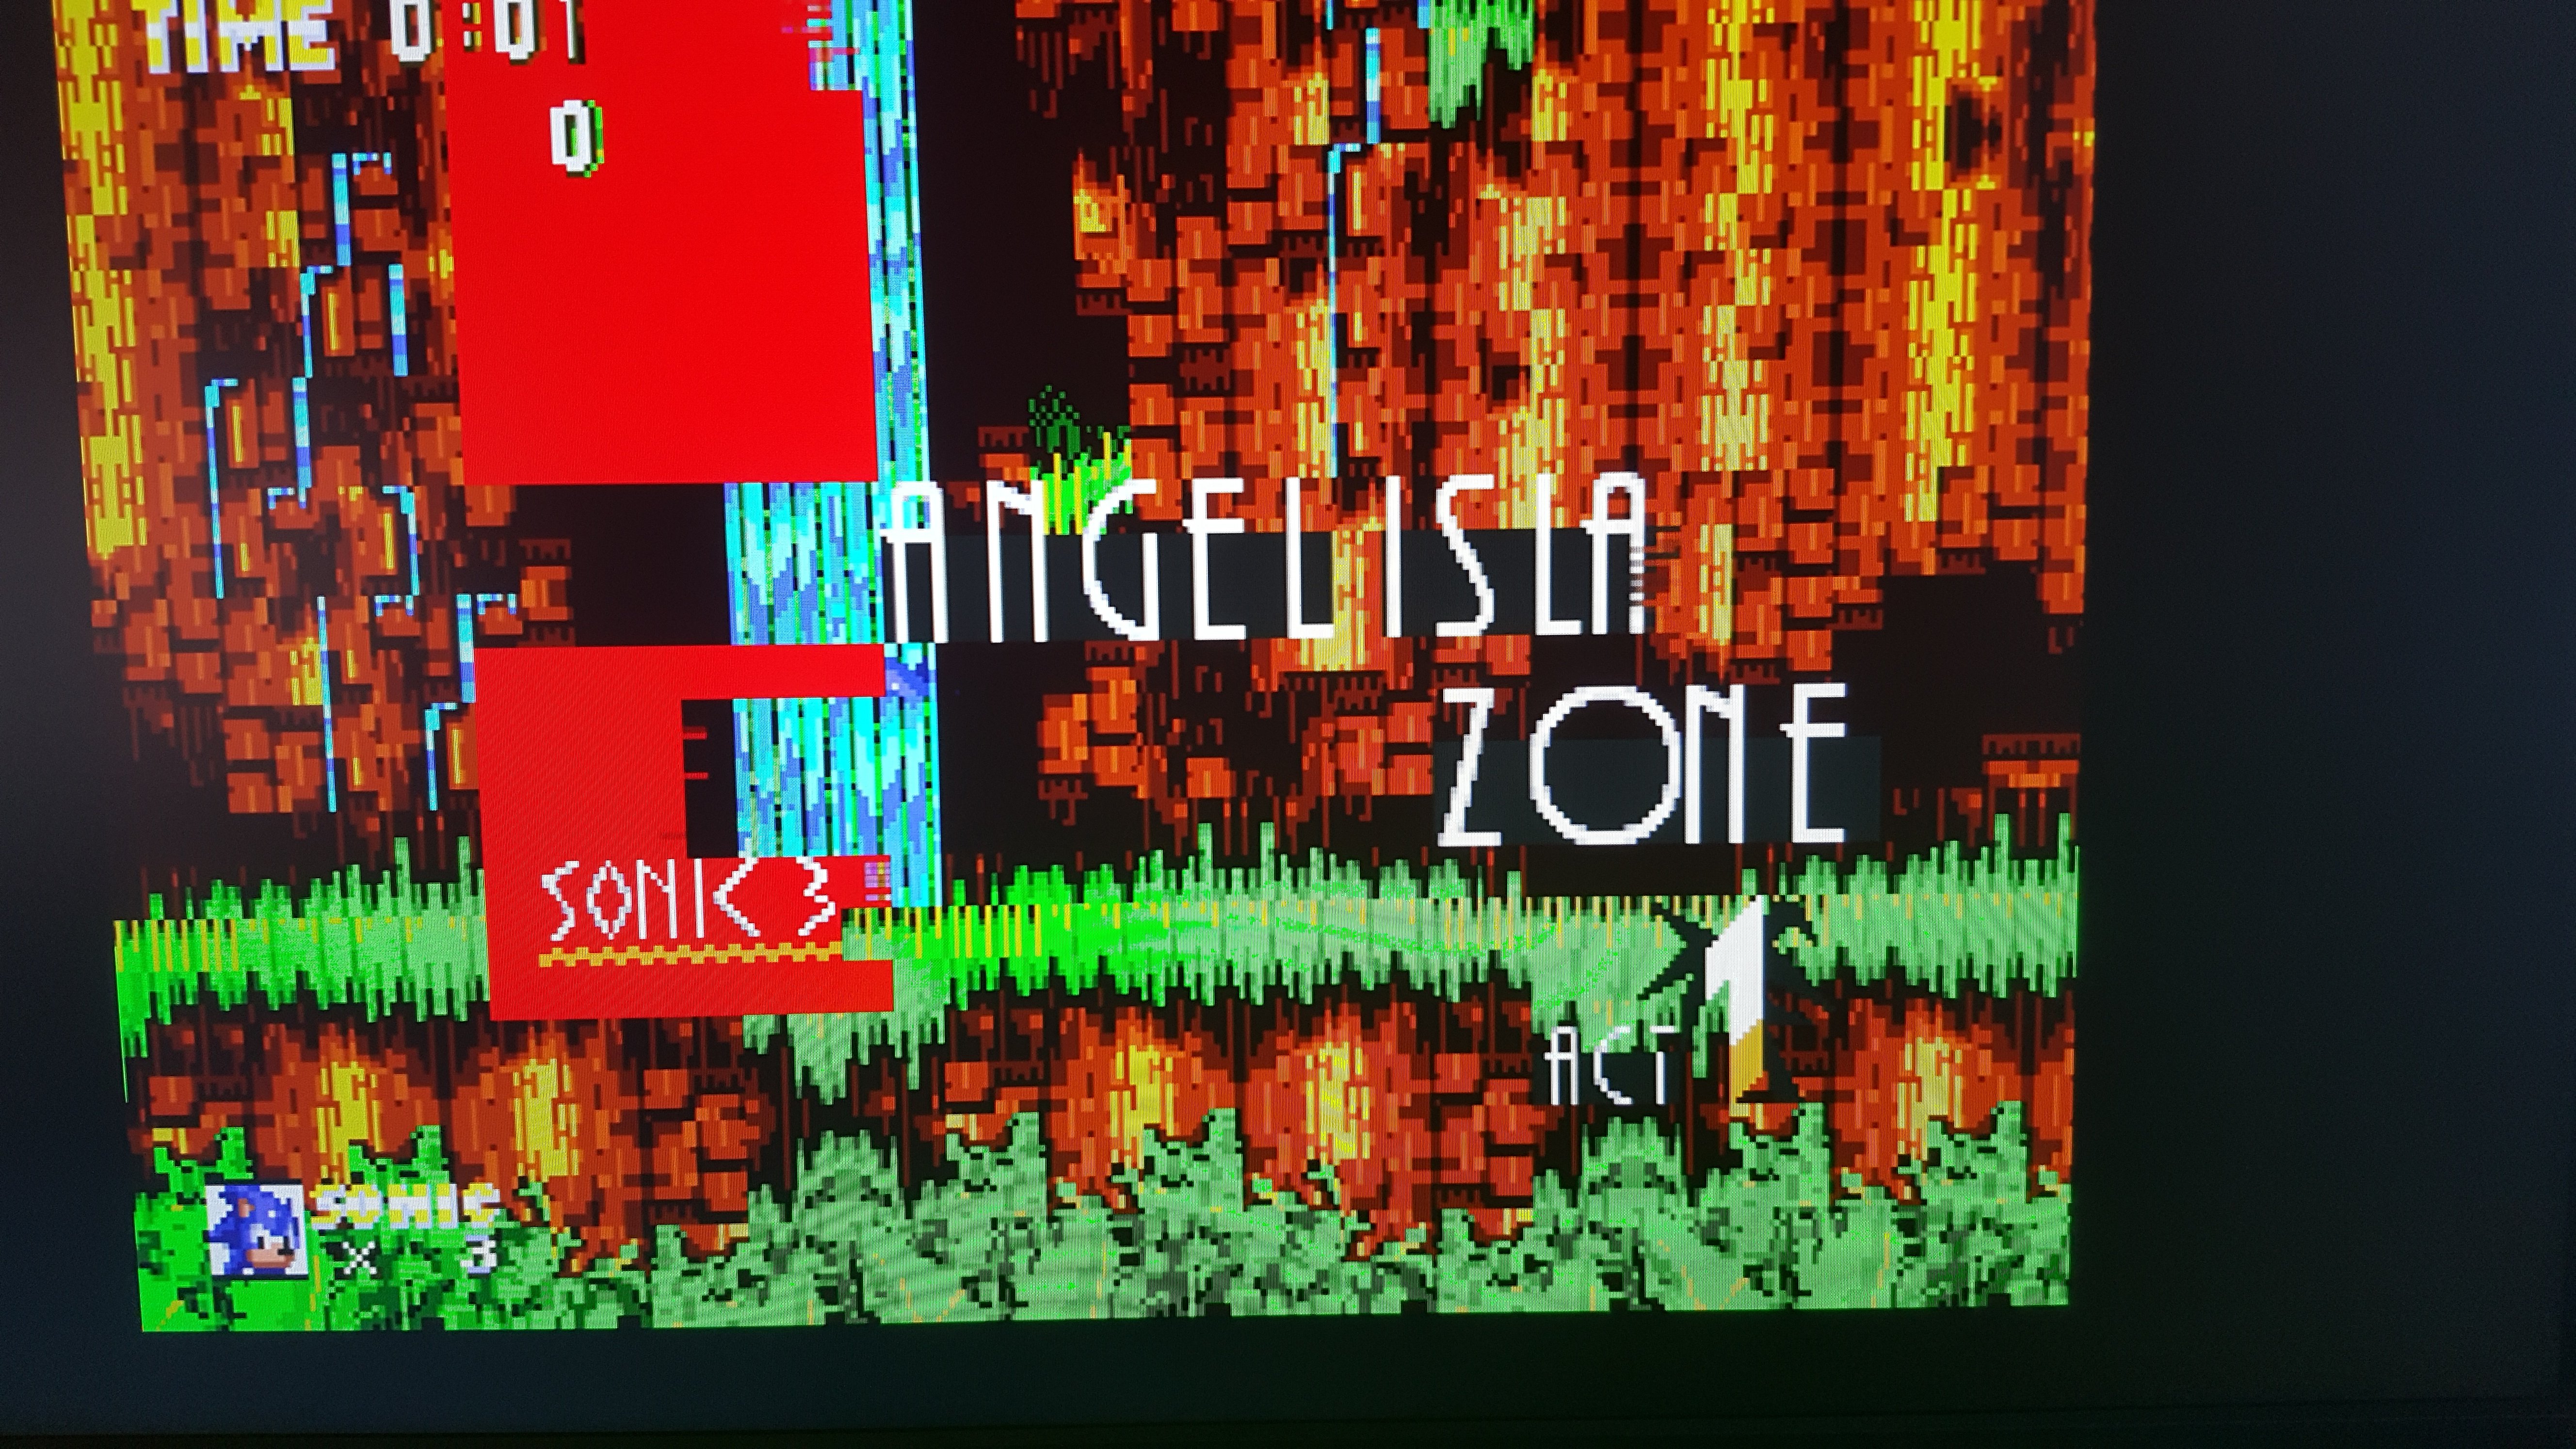
Sega Mega Drive / Genesis
The core has a bigger menu with more settings than other console cores, but it’s only beta.
Older versions:
For a long time the core was very buggy, the controller didn’t work in the menu, graphical glithes.
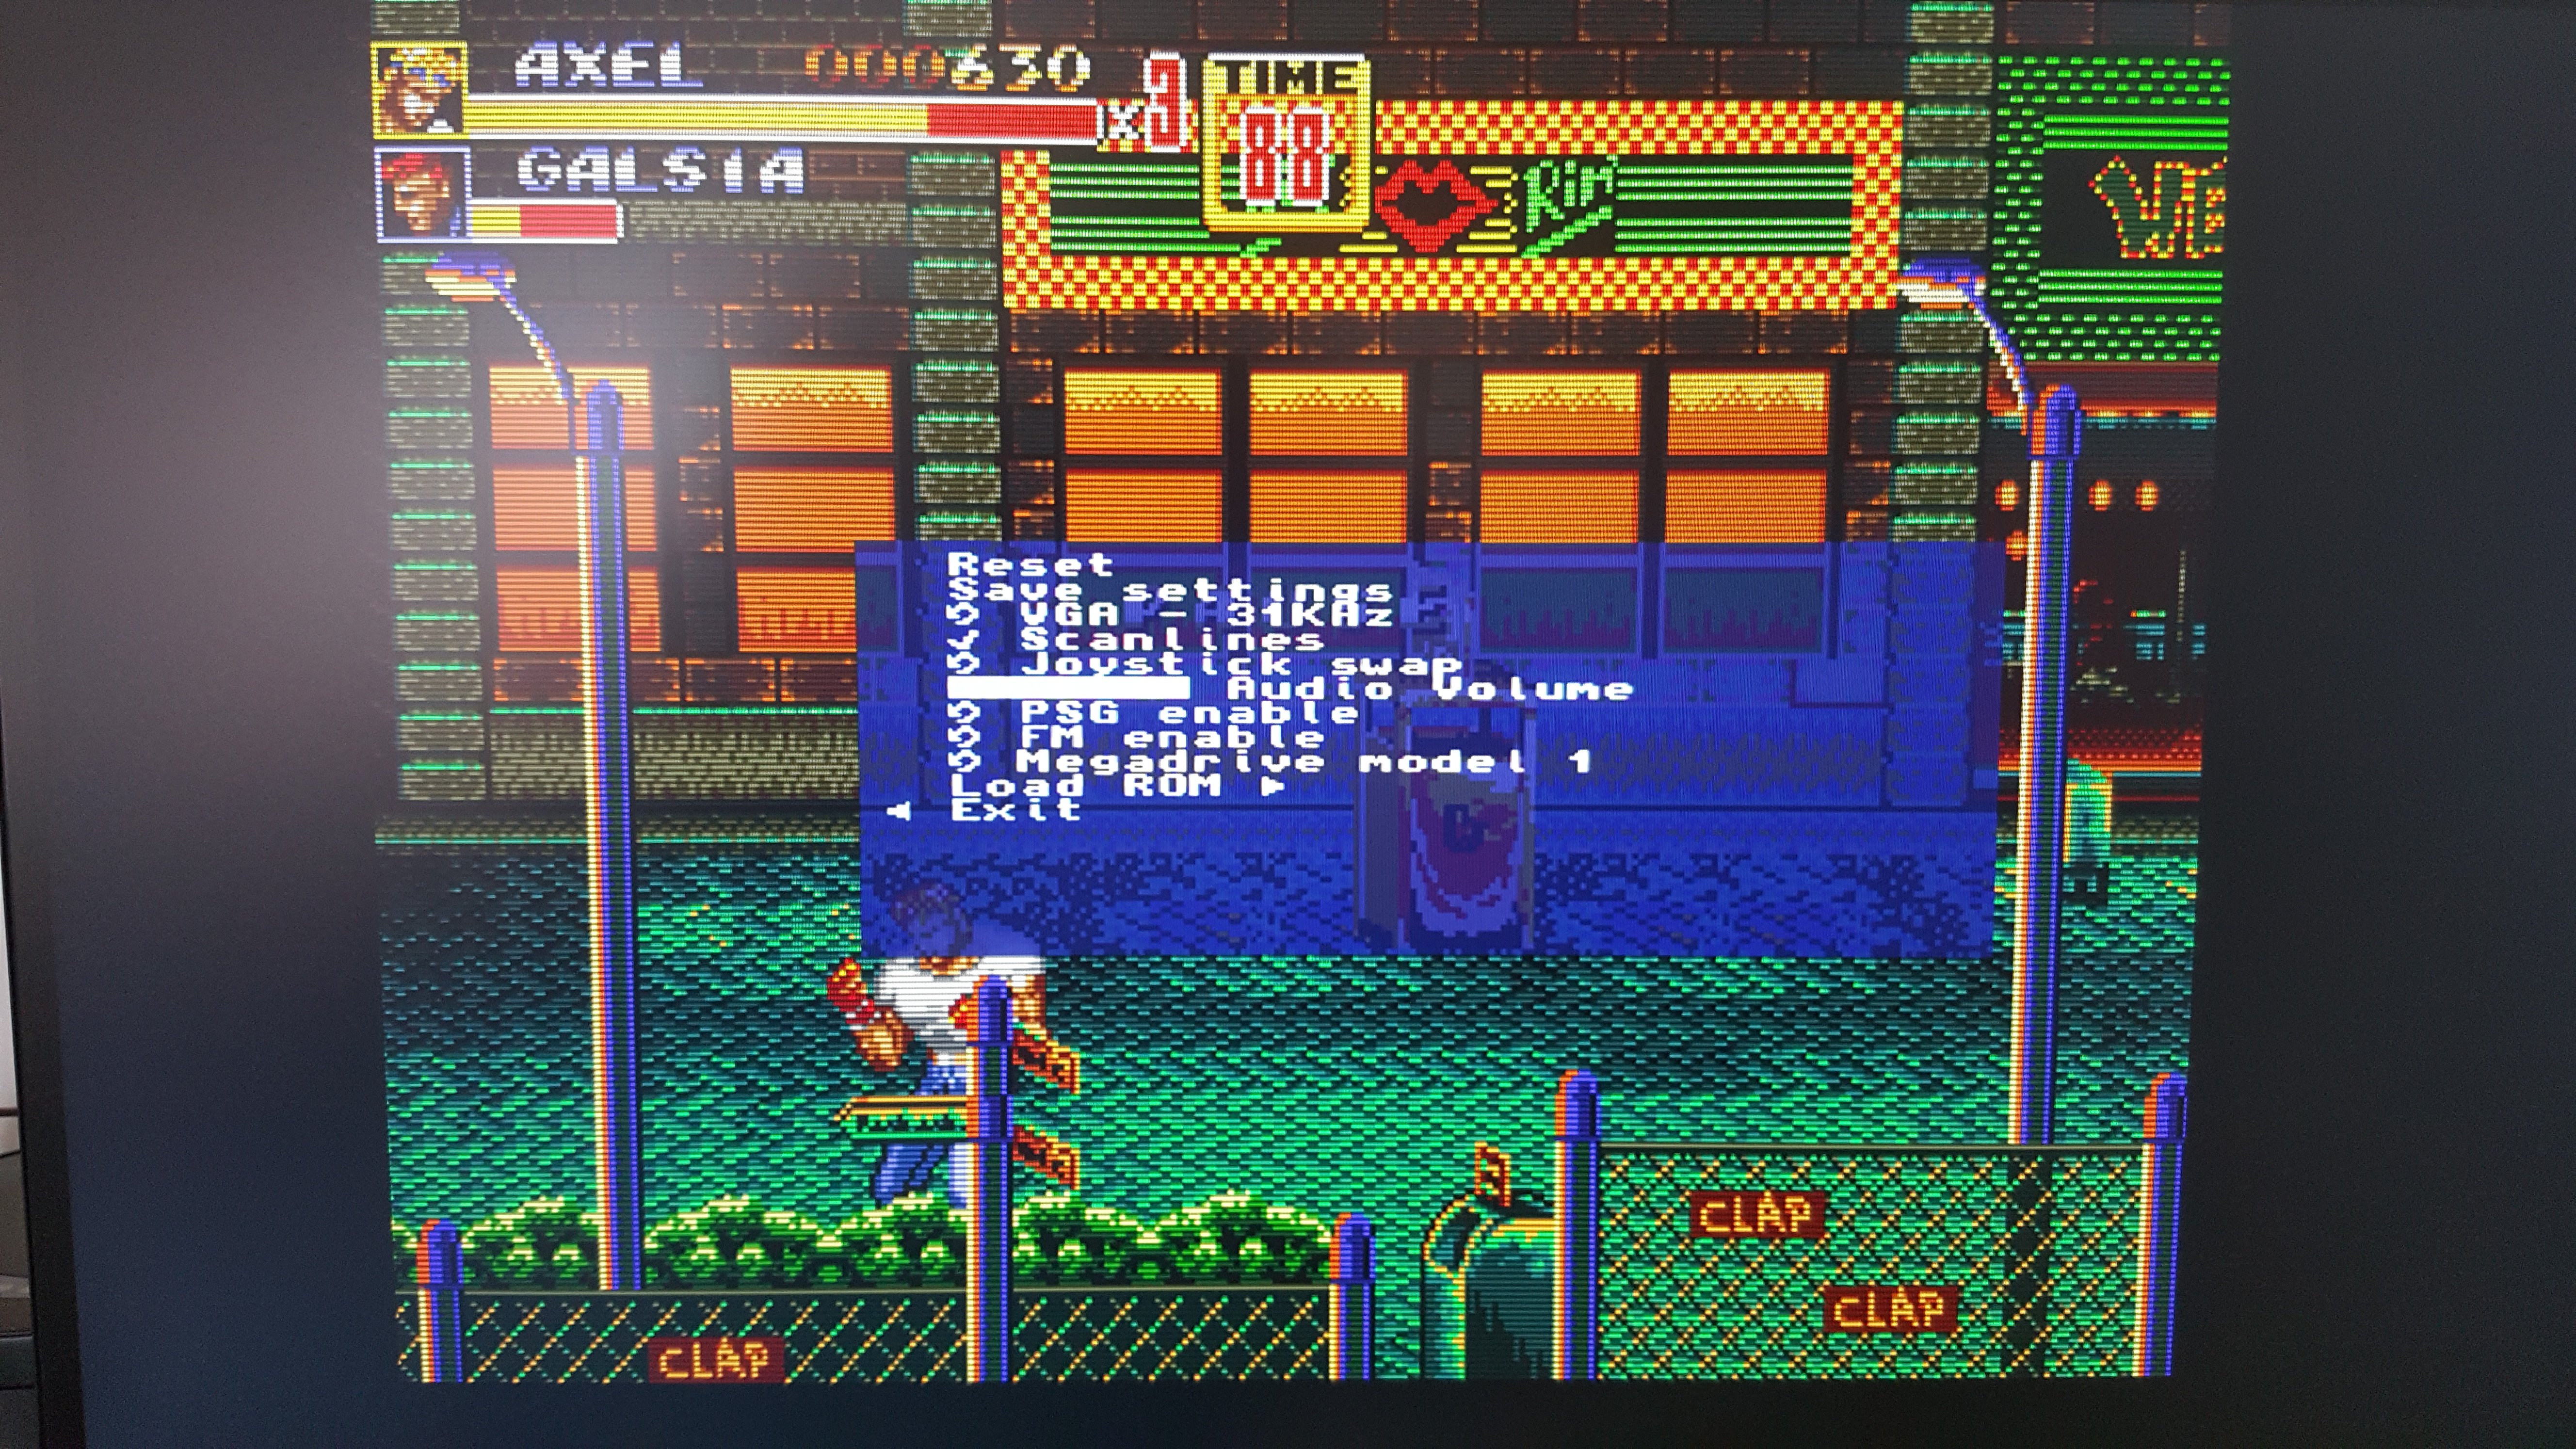
Following options are available in the main menu:
- Reset
- Save settings
- Change the VGA between 31 KHz and 15 KHz
- Enable/Disable scanline
- Swap Joystick
- Adjust Volume
- Enable/Disable PSG
- Enable/Disable FM
- Switch between Megadrive Models (1 and 2)
- Load Rom
- Exit
This is how Sonic 3 looked like:
Here’s a short video:
The actual version is very good, it has newer menu, no graphical issues and the sound core has been improved. I will update this section with new videos. In other words in 2017-2018 the genesis core had a lot of improvements and is considered to be stable and has good compatibility.