

I. What is Retro Freak?

Retro Freak (or RF) is a “multi”-console, which means it can play a variety of cartridges of several video game systems.
Some gaming consoles only play one format (like your NES), some can play two (main and via hardware backward compatibility, like PS2), some have some kind of software backward compatibility (WiiU), or in other words, they can emulate or play games from other systems. And there are also those, which only emulate old systems.

Retro Freak can be compared, of course, with Retron 5, Retro Duo or Super Retro Trio consoles. But there’s a further distinctions between software emulation and hardware emulation (or being a hardware clone). Retro Freak and Retron 5 are not hardware clones with similar to original hardware, but software emulator machines, running on Android. They do the same things as your tablet or Ouya or your smartphone. And your NES Mini. Almost.
The biggest difference between RF and your smartphone is RF’s capability to:
- accept real cartridges
- accept real controllers (via an adapter)
- and of course you can easily connect the console to your TV via the HDMI cable
All other hardware clones do the same, they accept cartridges and controllers. But RF (or Retron 5) do it somewhat different. Both consoles can read (=dump) cartridges (and save-states) and store them as ROMs in their RAM to run with the installed custom emulators, which are basically the same as on your smartphone with all those convenient functions like saving/loading etc.
Another advantage of RF is that it outputs in HDMI. I really like Super Retro Trio, it has a very good controller, it’s a hardware clone, works with Everdrives, supports a lot of systems. But it doesn’t output in HD. It’s the best solution for older TVs, but not that great for modern ones.
Cartridges from all these systems will be accepted on the RF (with a couple of exceptions). Not only cartridges, also ROMS! Although most roms won’t be recognised correctly (e.g. the publisher or year won’t be shown in the menu).

And if you buy this:

You can add another 3 systems: Mark 3/Sega Master System, Game Gear and SG-1000. This applies to real carts! You don’t this adapter, if you want to play roms, they work without the adapter.
One thing is to be mentioned as early as possible. The Everdrives don’t work with this console. But don’t worry! This console allows you to put your roms onto the microSD and start them as if they were dumped from real cartridges.
There is one drawback though: If you have a lot of roms, the loading time will be pretty long. So, an Everdrive would still be better, because it doesn’t build and refresh any libraries and start games just directly from files… It’s about 1 minute per 1000 roms.
RF will update it’s library upon every start and after every change in the library (a game is added or deleted). The library itself has multiple issues. A lot of information is missing, so a lot of games from Europe or USA will be missing their descriptions.
Now, let’s take a closer look at the main subject of this guide, the console itself.
II. Specs
Inside of the RF are:
- SoS: Rockchip RK3066
- CPU: Dual-core ARM Cortex-A9 (ARMv7), 512 KB L2 Cache
- GPU: Quad Core Mali-400 GPU
- VPU (Video Processing Unit) supporting 1080p, HDMI output
- 512 MB DDR3
- HDMI 1.4 Interface
- USB 2.0 interface
- SD/MMC interface, support for Micro SD upto 128 Gb
Following chips can be identified:
Cartrdige board
- Microcontroller NUC220VE3AN (for Cartrdiges) (by Nuovoton)
- USB Hub Controller GL850G (by Genesis Logic)
Console
- Rockchip RK3066 ARM SoC (by Rockchip)
- Nand Flash 4GB MT29F32G08CBADAWP-M:D (by Micron)
- 2 x 256 MB DDR3 RAM (NANYA 1508 NT5CB128M16FP – DII) (by Nanya)
- Power Control T659102
The box is running on Linux and customised Android.
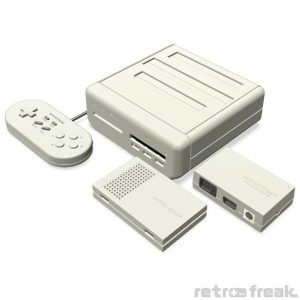
III. Package Contents
Main console: which is only a small PlayStation TV-sized module, that can be used separately from the cartridge reading module.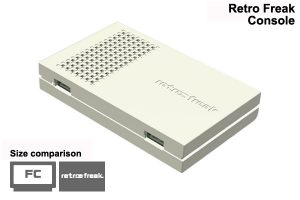

It has following outputs:
- 2-USB-Ports for controllers
- MicroSD-Port for the SD Card
- Power-Button and the port for the power supply
- HMDI-Port
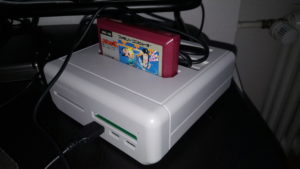
Cartridge reading module (the main console is already inserted into it when you unpack it for the first time) is used to read cartridges and has 3 USB-Ports and all the same ports from the main console (except those 2 USB ports, which will be used to connect this modules: You insert the main console into the reading module using the 2 USB ports on the main console). It’s primary function is to read cartridges. I like to keep the main console in this reading module, because it then looks like a real console.
What reading means, is that it dumps the rom into the internal memory (just like the Retron 5 does), but if you connect a micro-SD the console will also ask, if you want to save the rom on the card so that you can use it later without inserting the cartridge again. The format of roms is similar to all those roms in the internet, but each dupmed file is encrypted so you can’t use it on other hardware. I prefer to dump games with other tools (like Retrode) and put roms on the SD card.
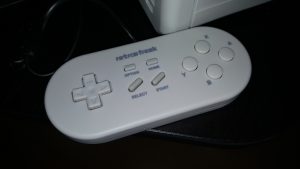
USB-Controller which has a similar to SNES controller layout. There are 2 extra buttons though: Option and Home. The controller is ok. The only complaint I have is its D-Pad. It’s very light and it isn’t greate for shoot’em’ups (circle pad from genesis or PC Engine is better). The rest is ok. Also, the controller is not suited for Mega Drive games. Analog sticks would also be great for all those shoot’em’ups.
If course you can use any USB controller with the Retro Freak, or even 8bitdo’s bluetooth adapter and use any modern controller that’s supported by this adapter.
Controller Adapter (in the Premium Version) which allows you to use original controllers from NES/AV Famicom, SNES/Super Famicom, TG16/PCE, Genesis/MegaDrive and also there is a Famicom Expansion Connector.
A NES-to-Famicom (or Pin)-Adapter. RF can only accept Famicom cartridges, but using this adapter you can also play your NES games. A nice addition for the western version of RF.
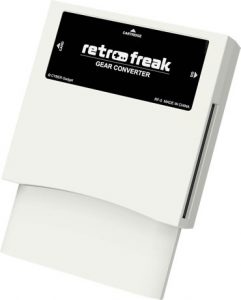
There is also an optional adapter for Sega Master System, Mark III, Game Gear or SG-1000 cards, but you need to buy it separately. It allows you to play games for these mentioned systems. The cost is about 70$.
Then there’s an HDMI-Cable, a USB-Cable for the controller adapter, some paper manuals (in Japanese) and that’s all.
IV. Supported Cartridges/Systems
What systems are supported on the RF:
- Famicom
- NES (via included or any other adapter)
- SNES
- Super Famicom
- Genesis
- Mega Drive
- Game Boy
- Game Boy Color
- Game Boy Advance
- PC-Engine
- Turbo-Grafx 16
- SuperGrafx
Everdrives will not work. Also the console won’t run properly all those multigame chinese cartridges. I have also one cartridge made by Cluster and it doesn’t work either. What I recommend is to dump roms from these cartridges and put them on the micro SD. Roms are accepted better than real cartridges.
Also, if you use a game which won’t be recognised, try dumping it with RF anyway. Yes, the filename will be incorrect, but you can attach the micro SD to your PC and correct the filename.
V. Operating
Main Screen
The main screen consists of two sides. The left side contains information about the current game and game options. On the right, the status of the storage is shown (top right), then the library of systems and the number of games. In the bottom right corner there are the system options, the “Off”-button and the electronic manual. The menu is simple, but elegant. Overall, I like it more, than if it was just the generic android UI, like on GPD XD. It is also better, than RetroPie, in my opinion, especially the possibility to change many options and the in-game menu.
Starting for the first time
When you start the console for the first time, you’re given the choice to select the system language. Then you need to read the terms and conditions.
Starting a game
When you start your console, after a short splash-screen the main screen will appear. If you have any games on your micro SD, the library will be refreshed (every time!). If you have about 2 thousand games, prepare to wait for a 3-4 minutes.
From Cartridge:

On the left there will be a placeholder for a game screenshot and this text “Select a game via the micro SD icons on the right” and below the grey box: “No cartridge inserted“.
From here you can either use your cartridges or start a game from your library on the Micro SD.
Below the gray box there are 4 options: Cheats, Game Settings, Controllers and A/V Settings. These are available to every game.
To start a game from a cartridge insert it into the corresponding slot. You don’t need to do it while the console is off (like with old consoles). Gently push the cartridge on both sides until it sits firmly.
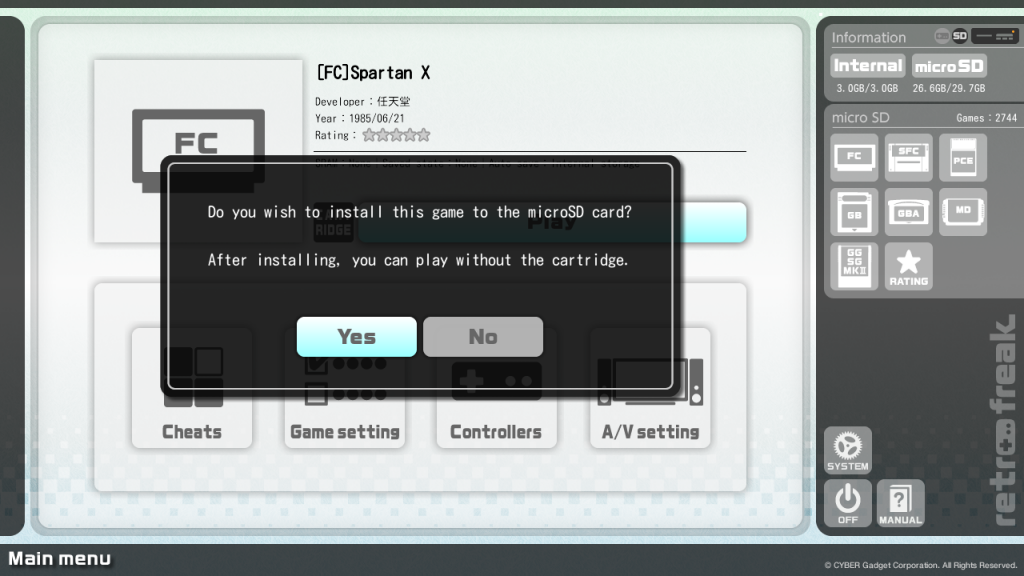
If the game is not in your library, the console will show the following text: “Do you wish to install this game to the micro SD card? After installing, you can play without the cartridge“.
This is only possible, if you have a Micro SD-Card inserted. The game will be added to the library and you won’t need to insert the cartridge again. The dumped rom is encrypted and you won’t be able to play it somewhere else. Without the SD-card, the game will not be stored and this message will not appear.
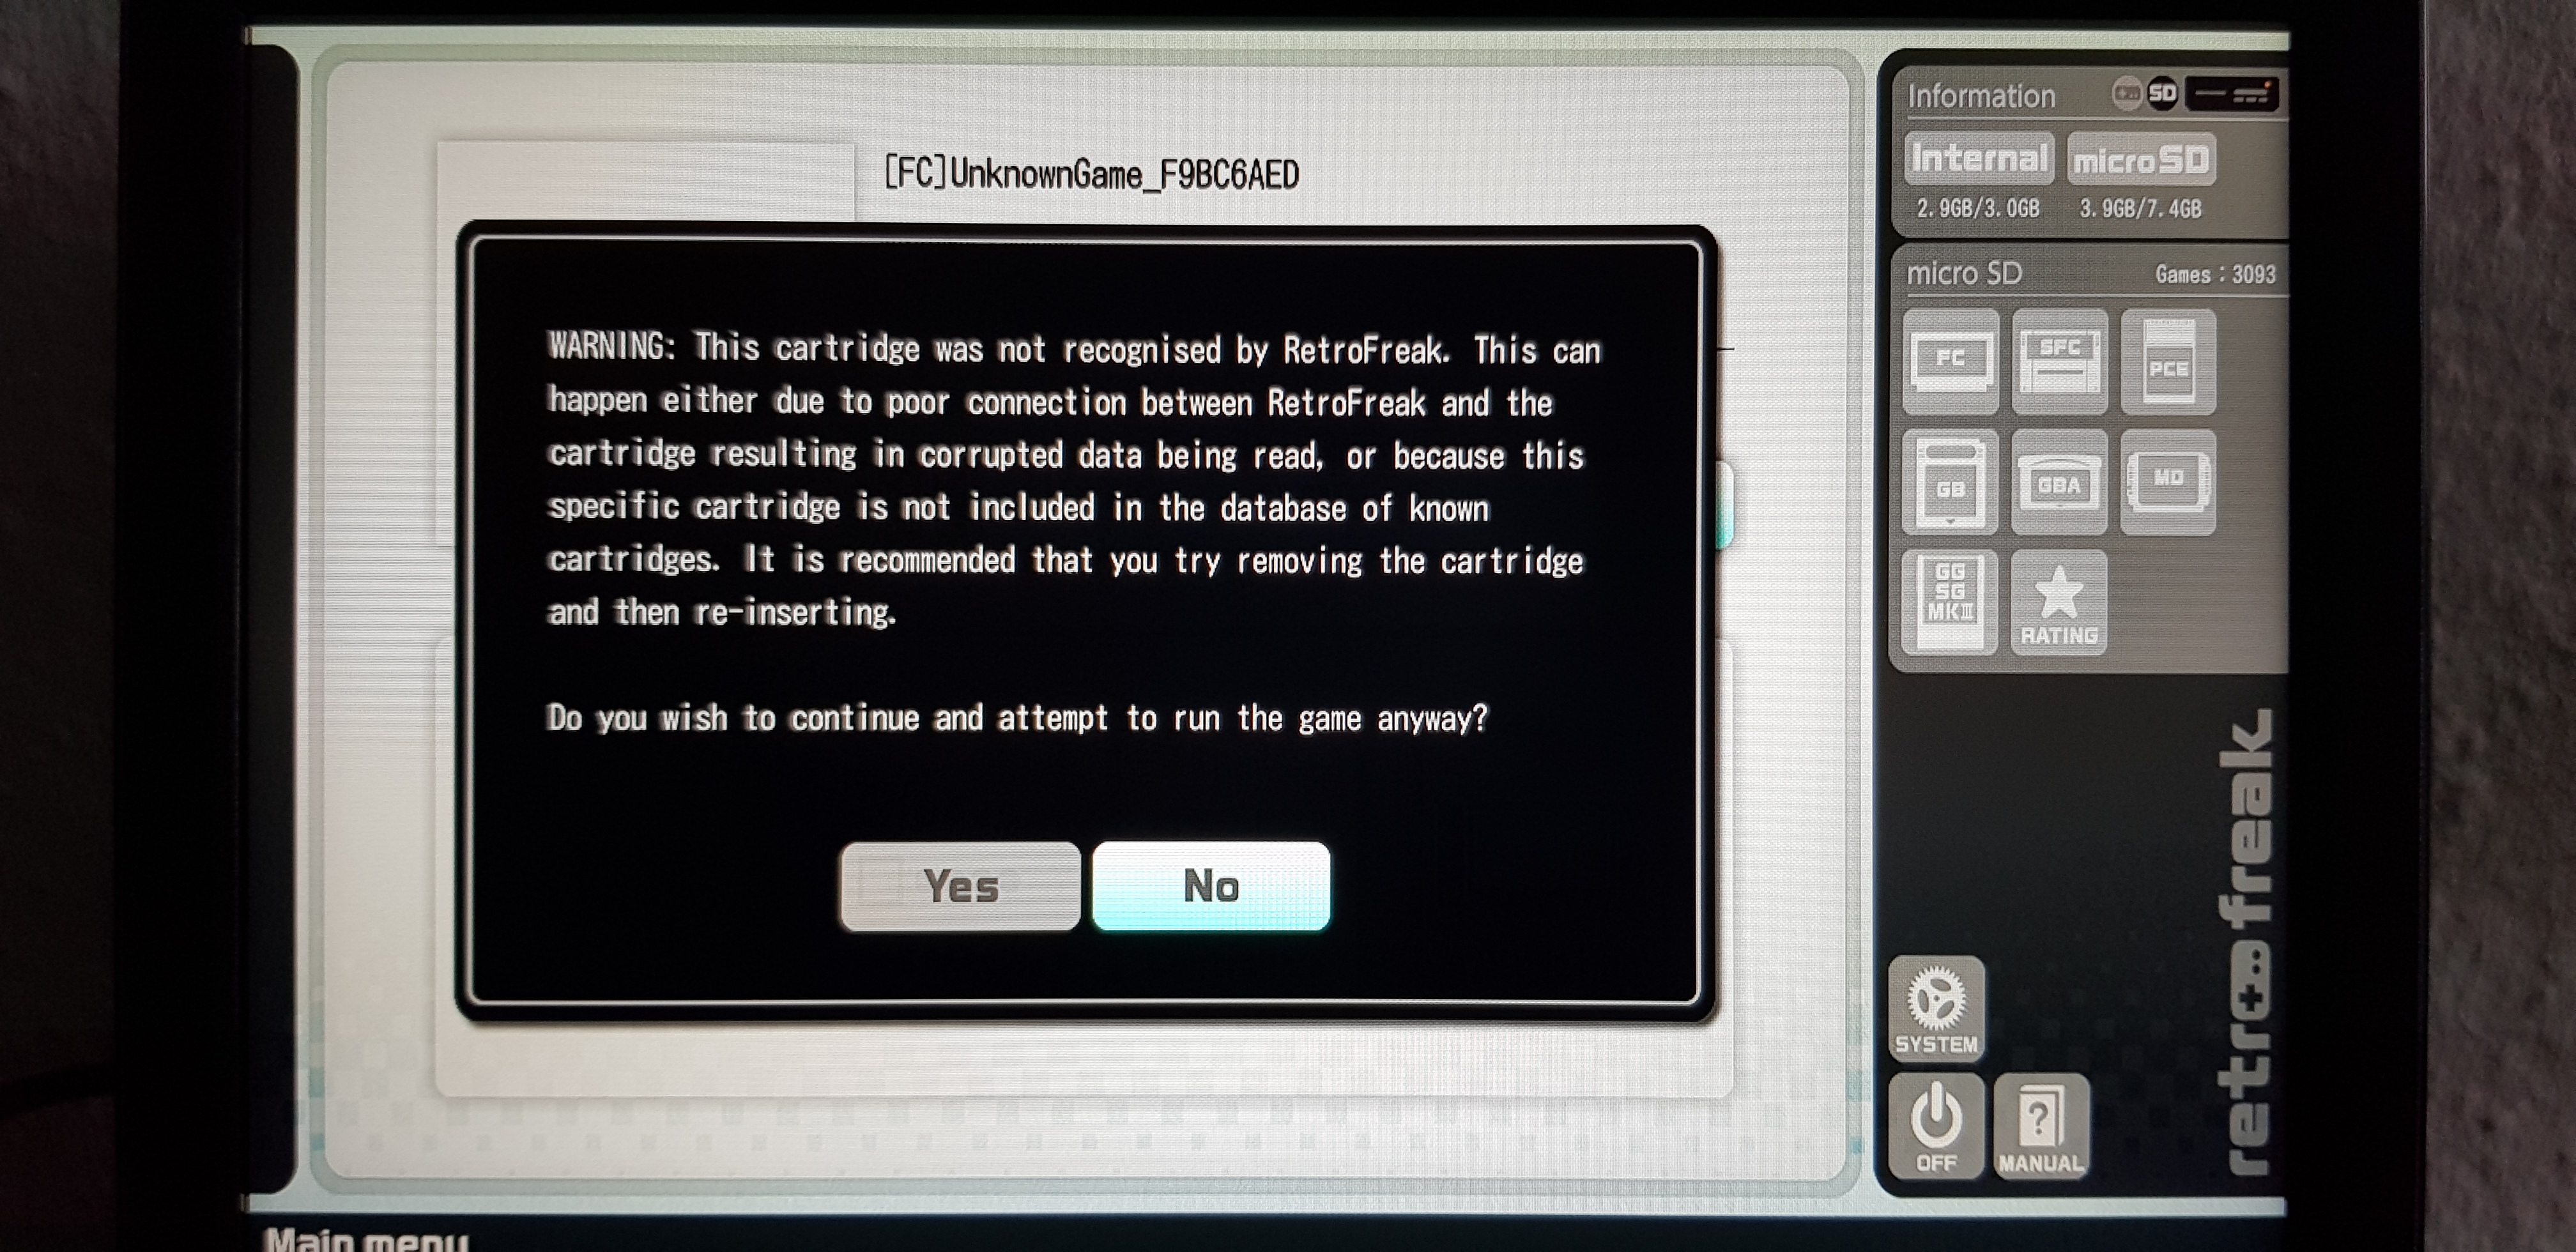
Also, if the game is not recognised, a warning will be shown. You can still run the game, but the title will be not recognised. Sadly, you can’t edit the title or make any changes in the database. This is also the case with all those roms, which are not recognised. But as I already mentioned, you can just open the SD card on your PC and edit the filename again. The filename is used as title of the game.
To start the game, the focus should be on the button “Play”. Press “A” to start the game. No Linux texts , right into the game (that is why I don’t like RetroPie).
From Library:
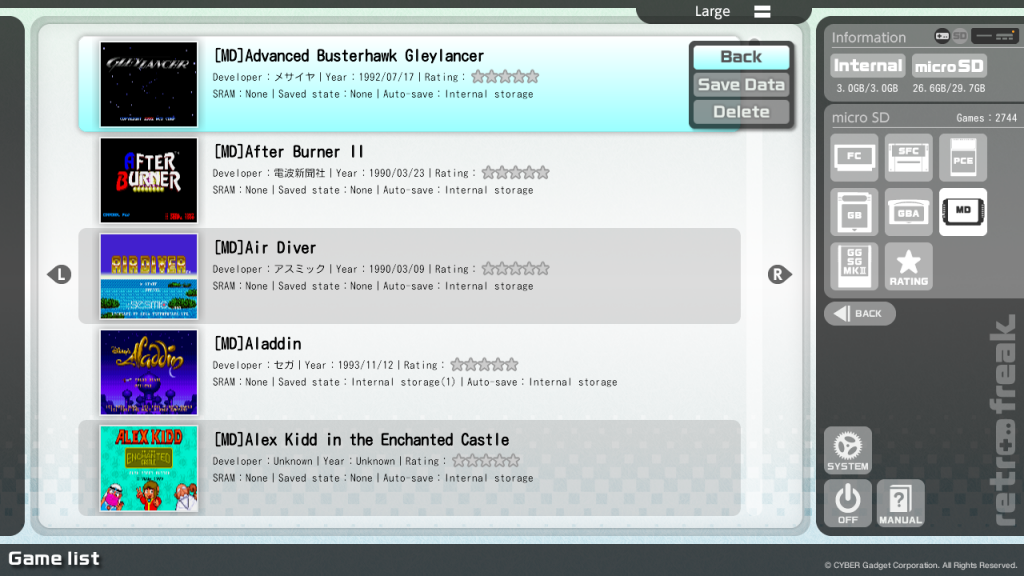
To start a game from your library, navigate to one of the systems and press “A” to show the list of games. The left side will be filled with a list of games. You can change the view of the list. Choose a game and the press “A” to start it.
Closing a game
If you want to close the current game and return to the main menu, press “Home”. And the in-game menu will appear. Navigate to the button “Back main menu” and you will be redirected to the main menu. You can also use the configured shortcut.
Ejecting the cartridge: make sure the SD-Card is not used by the system. No need to power off the console! Gently pull the cartridge (with left-right alternating movements) out of the console. Time to play another game!
Rating a game
You can’t change the game information (alas!), but you can games! Navigate to the line with stars, press “A” and then adjust the stars. Some games will be already rated from the database after their first installation.
Making Screenshots
You can make screenshots in the main menu with OPTION+HOME and in the game using the menu option “Take Screenshot” or using the combination OPTION+Y. Main Menu screenshots are stored in the root folder of the Micro SD and game screenshots in RetroFreak/Screenshots.
Fast Forwarding
Press OPTION+X if you want to rewind the game.
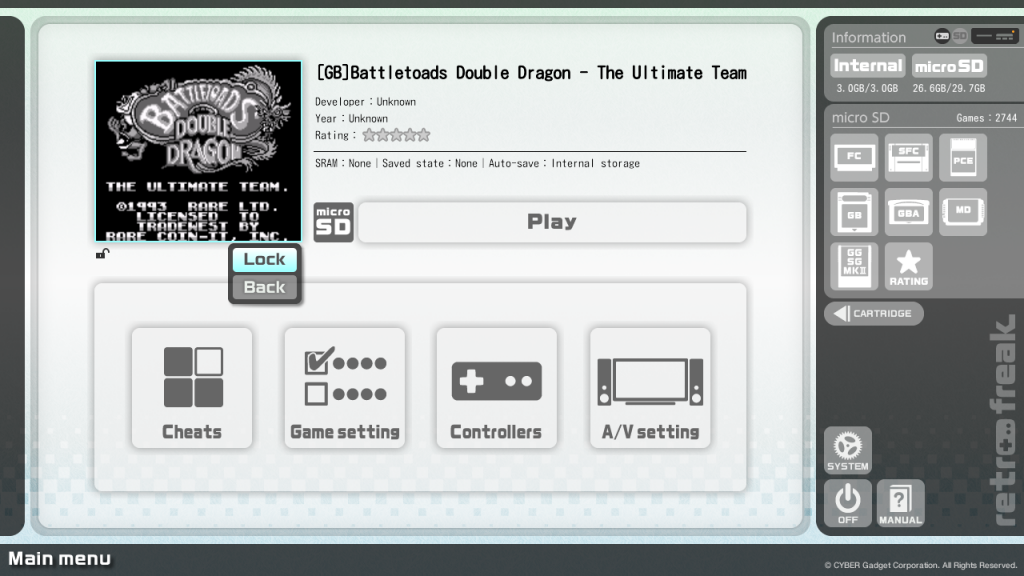
Lock the screenshot
When you leave the game and go into the main menu, the screen of the game (autosaved) or the screen from the save state will be shown in the menu. You can lock this screenshot!
Leave the game and press left to navigate to a small lock. Press “A” and choose “Lock”. Now the screenshot will represent the game and won’t be changed.
Saving/Loading
Go into the in-game menu, choose the slot and then use options Save and Load. Or use button combinations Options+R (Save) and Options+L (Load).
Shutting down
Navigate to the button “Off” in the main screen and press “A”.
You can also turn off with the power button. Press it for 3 seconds.
VI. Options
VI.1 Main Menu Options
The main menu options can be found in the bottom right corner. The button says “System”.
Following options are available:
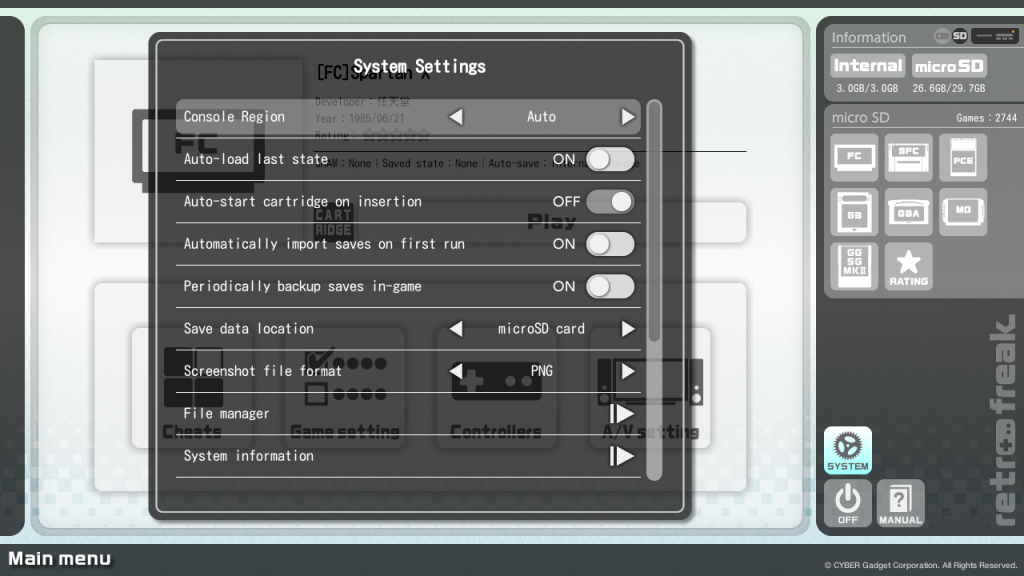
- Console Region: auto / USA / Europe / Japan: You can choose the region since some of the games are sensitive to the region settings, mostly mega drive games. For some consoles, the speed of the game will be different.
- Auto-load last state: ON / OFF: This will load the last save-state automatically after starting the game
- Auto-start cartridge on insertion: ON / OFF: Maybe you want it the old school way? Insert the cartridge and the game will start automatically.
- Automatically import saves on first run: ON / OFF: If your cartridge still has 20-30-years old saves, they will be automatically imported after you insert the game for the first time (if battery ia atill working).
- Periodically backup saves in-game ON / OFF: I guess it’s for those rare occasions when the console would hang.
- Save data location: Internal storage / Micro SD: If you want to have your save-states on your Micro-SD, here’s the option for this.
- Screenshot file format: PNG / JPG: If you care, you can choose the format you like most.
- File Manager: This option will start the file manager, where you can find unwanted files and delete them (or copy). If you have a lot of roms, I wouldn’t recommend to delete games from here. After each operation the library will be refreshed and you know how long it can take. You can access both the internal memory and the SD-Card.
- System Information: There are two sections here:
Version information
- Retro Freak Application version
- System Software version
- Hardware Revision
- Dumper firmware revision
Storage information
How much is left on your internal storage or your micro SD card is shown here.
- Write firmware update request to Micro SD: It’s really strange, how the update works. But folks from Caber Gadget want to make sure only console owners download their files. Maybe they also analyse something? This options writes a request for update file onto the Micro SD so that you can go to the site and get an update file. See the Section VII for detailed instructions.
- Write game database to XML: Only for reference purposes apparently.
- Change system language: If you want to change your system language to something else, you can do it here. Available languages are in the order shown in the menu: Japanese, English, Chinese, French, German, Polish. Wait a bit, maybe Spanish will be added soon.
- Display license agreement: The last option will show you the terms and conditions in a really small font. Have fun!
VI.2 Game Options
This is something real consoles not always can offer (except you’re using an Everdrive).
These options can be applied to each game separately:
- Cheats: apply a cheat
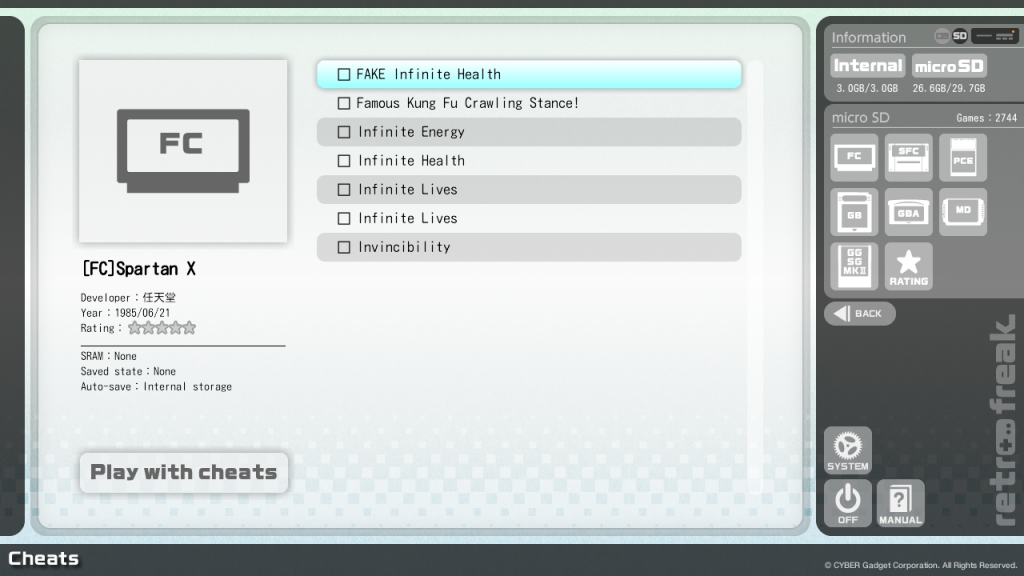
Cheats for japanese games can be downloaded from the official site. Then put the extracted folder “Cheats” into the folder “RetroFreak”. The official database is very limited and all descriptions are unfortunately in Japanese. Just in case you want to use them, memorize the word “無敵”, which means invincibility. I will try to translate the database and put it online later.
For western versions you can use the cheat-code databases from Retron 5.
Cheat-code databases for Retro Freak would need to have following names:
- codes-fc.xml : for NES and Famicom
- codes-gb.xml : for Gameboy and Game Boy Color
- codes-gba.xml : for Game Boy Advance games
- codes-md.xml : for Mega Drive and Genesis Games
- codes-pce.xml : for PC Engine
- codes-sfc.xml : for Super Nintendo and Super Famicom
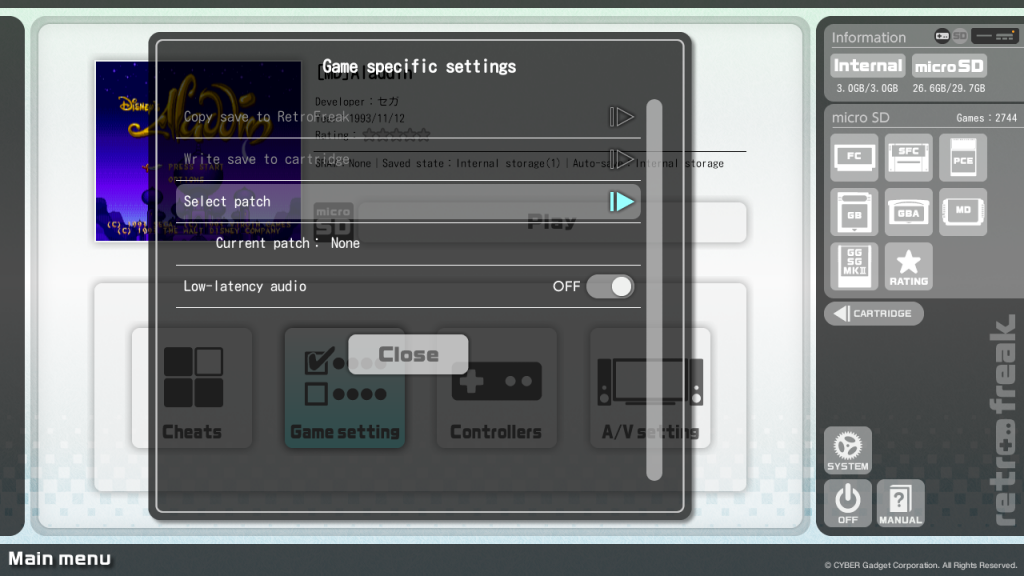
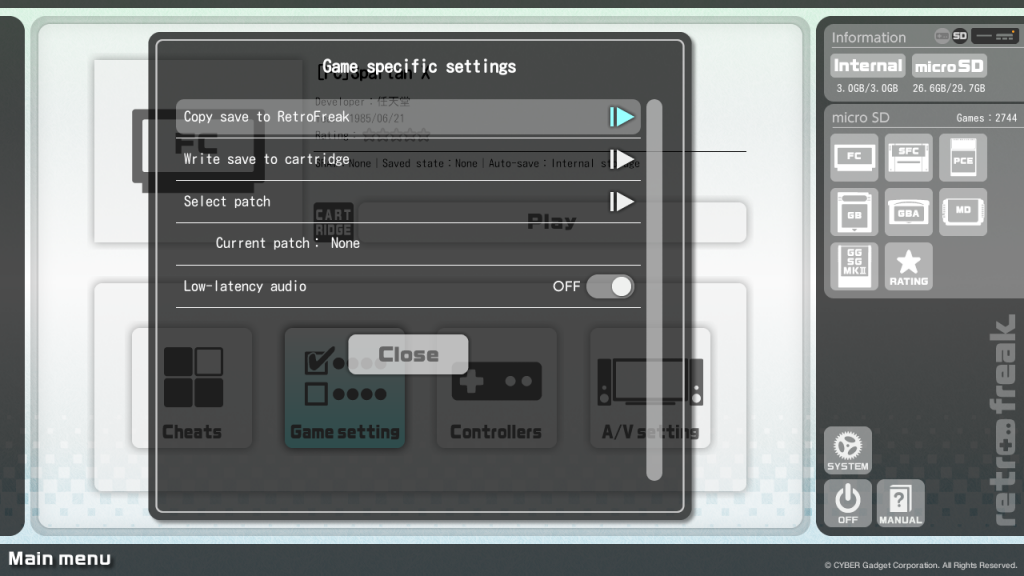
- Game settings: here you can manage save games (reading and writing from/to cartridge), apply patches, adjust audio, hardware type and color palette (for Game Boy)
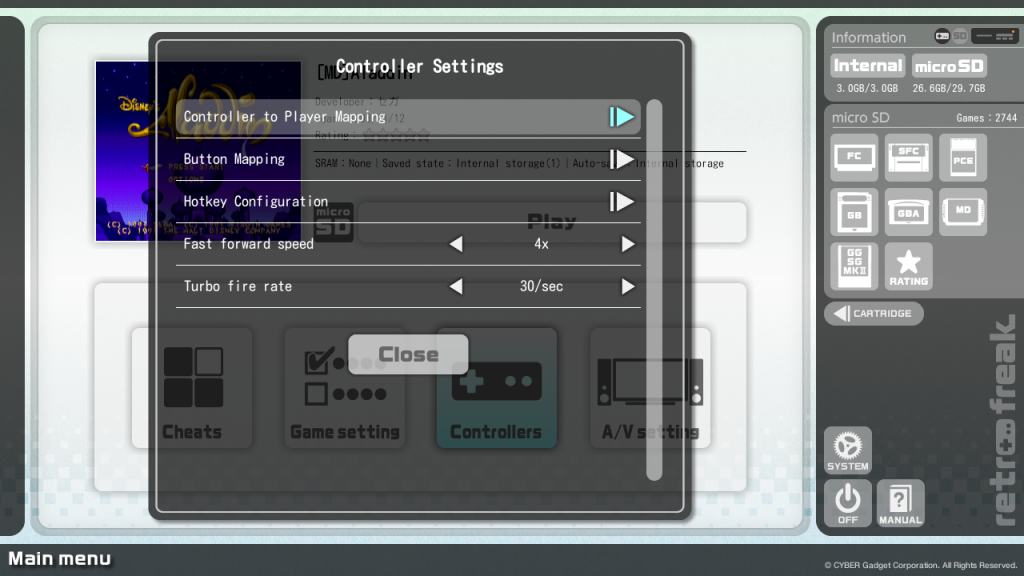
- Controllers: here you can remap your controllers and change the button mapping schemes, hotkeys, change the forward speed or adjust the turbo fire rate. Like on those PC-Engine controllers, cool?
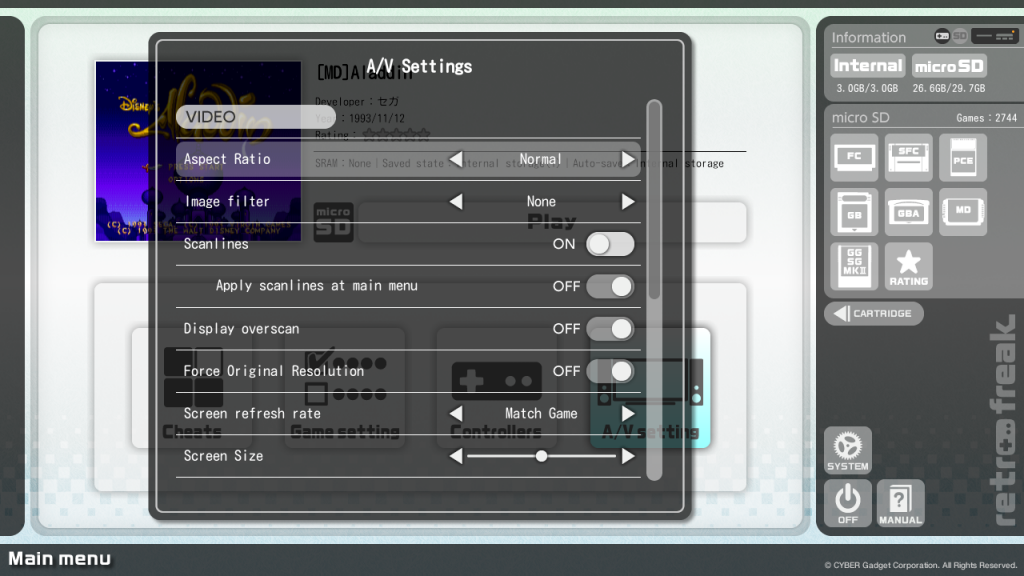
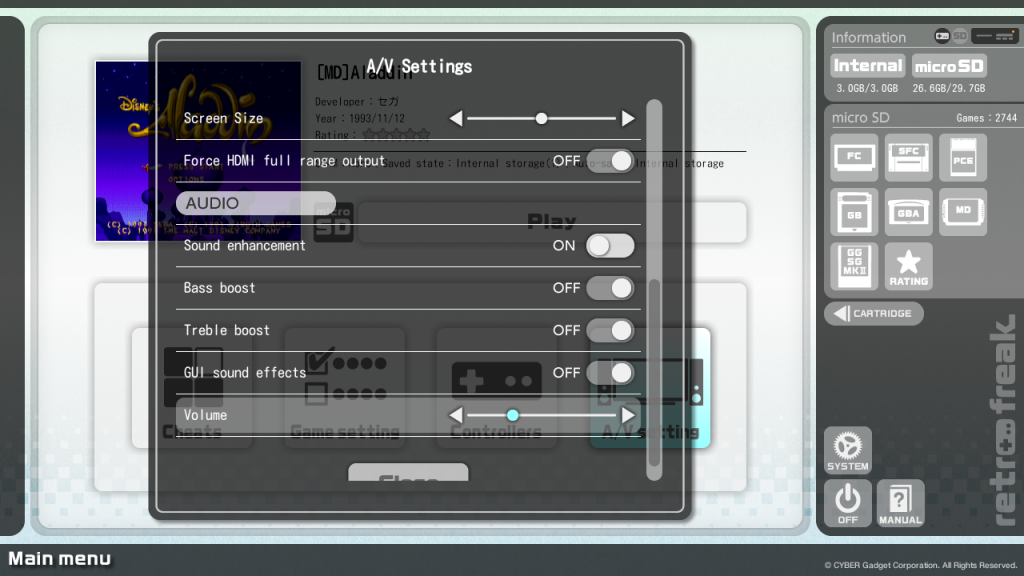
- A/V setting: very important! You can adjust the aspect ratio, choose an image filter, enable scanlines (for the game and for the main menu), enable overscan, force the original resolution, choose the refresh rate (match games, 50/60 Hz) and at last, change the screen size if it doesn’t fit on your monitor. That’s not all! There are also audio options and the main volume slider.
- Aspect Ratio: you can choose between normal, stretched and zoom. Normal shows the normal aspect ratio (e.g. 4:3, but handhelds have other aspect ratio), while stretch will show the wide versio which is a matter of taste. Zoom is pointless, except maybe for handhelds. For normal consoles the image is zoomed and lot of area is outside of the screen.
- Image filter: you can choose between none/2xSai/Super 2xSai/Super Eagle/Scale 2x/lq2x/hq2x. For me they all (except “none”) look similar and are just a nice addition. I never use them.
- Scanlines: what I often use and like, are scanlines. This option adds virtual dark lines to emulate old CRT image.
- Apply scanlines at main menu: add scanlines to the main menu
- Display overscan: show or not show area, which wasn’t visible on CRT-TVs. On NES and Sega Mega Drive programmers used this area as buffer and it sometimes just contains coloured areas or some pixel garbage. On Mega Drive and NES disabling the overscan would make the picture a bit nicer. I didn’t notice any effect on other consoles.
- Force Original Resolution: the image will become very squeezed, therefore I don’t think that this option makes sense. Maybe it’s intended for handhelds, but major consoles look worse with this option.
- Screen refresh rate: you can choose between match game/force 50 Hz/force 60 Hz. You can choose how to display games from different regions. With “match game” the refresh rate will be deducted from the rom information and PAL games will run in 50 Hz and non-PAL in 60 Hz.
- Screen Size: adjust the screen size (Zooming).
- Force HDMI full range output: as it says, but you need a compatible TV-set and this option actually has no sense for old consoles
- Sound enhancement: is per default enabled and it really improves the quality and add extra depth and stereo.
- Bass boost: adds noticeable bass
- Treble boost: adds treble
- GUI sound effects: enable or disable sound effects in main menu
- Volume: very good option! You can adjust the volume of the sound
VI.3 In-Game Options
In the in-game options menu following options are available:
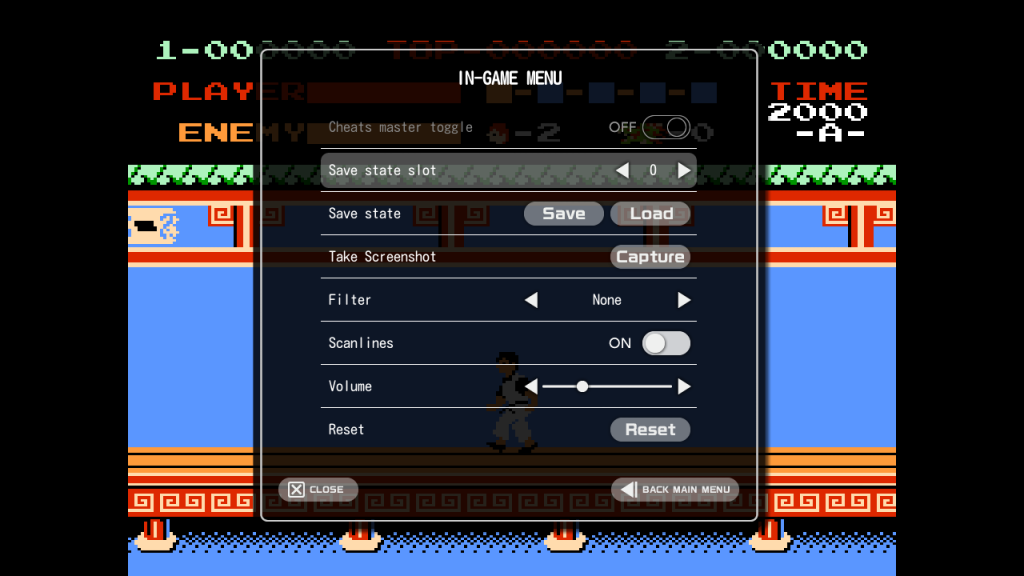
- Cheats master toggle: ON/OFF – enable and disable cheats
- Save state slot: you can choose the slot to save in or load from. The range is from 0 to 99. NES mini loses.
- Save state (Save, Load): here you can save or load states.
- Take Screenshot: if you don’t know the hotkey for this, use this option.
- Filter (None, 2xSal, Super 2xSal, Super Eagle, Scale2x, lq2x, hq2x): here you can apply a filter, if you like. I don’t.
- Scanlines (ON/OFF): you can enable/disable the scanlines here for a retro look
- Volume: the volume of the sound
- Reset: resets the game
- Close: close the menu
- Back to main menu: return to the main menu
VII. Hotkeys
If you’re using the standard controller, following hotkey combinations are available:
Main menu:
- D-Pad: navigation
- A: select or confirm
- B: go back or cancel
- Option+Select: make a screenshot
- Y + Arrow Up/Down: Scroll pages up and down
Game list:
- Select: sort menu
- L/R: change the size of the list
- Option: show the option menu
In-Game:
- Home: in-game menu
- Home+R: return to the main menu
- Option+X: fast forward
- Option+Y: screenshot
- Option+L: load state
- Option+R: save state
- Option+Select: microphone (on Famicom only)
- Option+Start: switch side of an Famicom Disk System Disk
If you’re using another controller, you will have to change the mapping manually. You can save it as a preset for future uses.
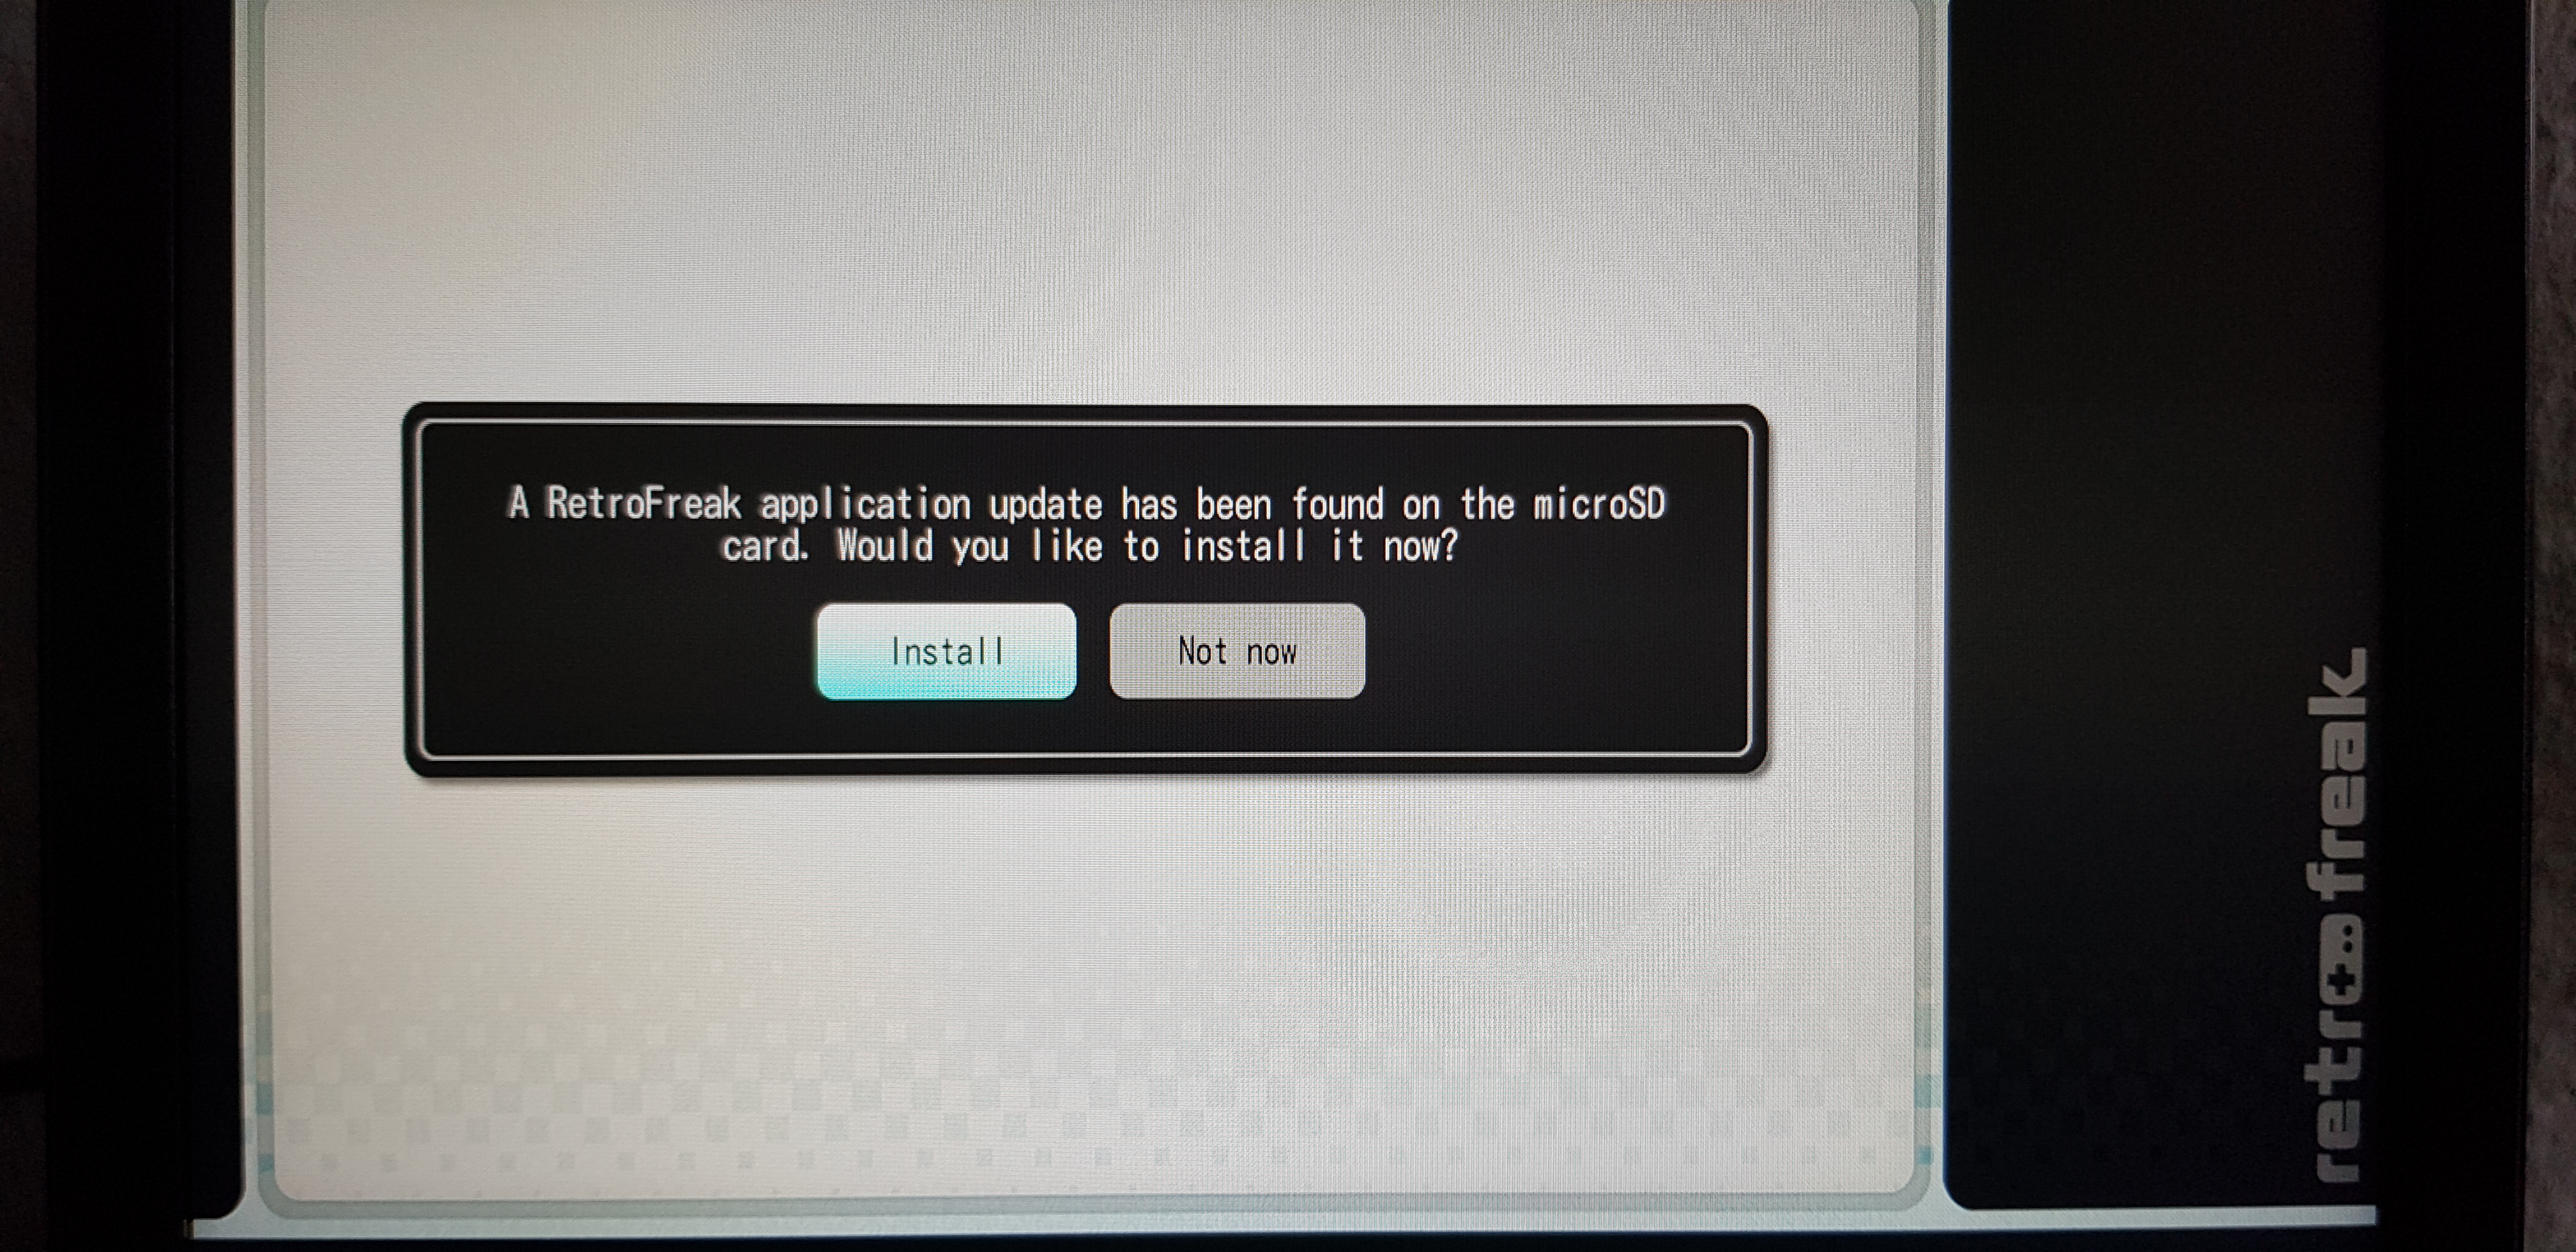
VIII. Updating
To update the console, insert a Micro SD Card, go to main settings and choose “Write firmware update request to Micro SD”. A file will be written to the micro SD card. Then go to the official site and choose the update file you need. You will be forwarded to a special download page where you first need to choose your request file and then you’ll get the firmware update.
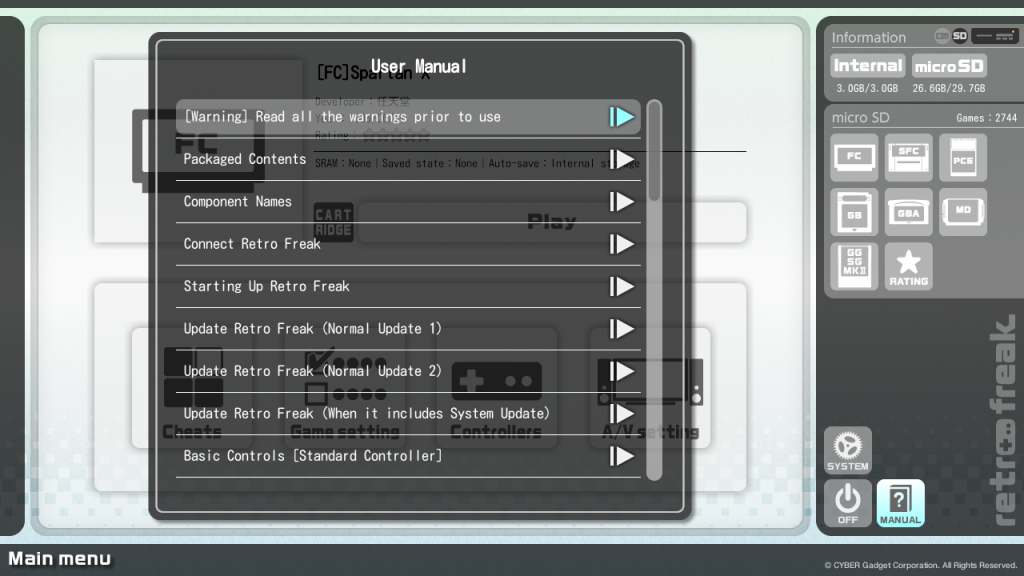
IX. Manual
Still need help? Go to the electronic manual (bottom right corner in the main menu). Lots of interesting and useful information!
X. Emulation Quality
NES/Famicom
You need to pay attention, what kind of roms you’re using and what region is set in the console main settings. It is better to use the region Auto, so that the system will adjust the speed of the emulation.
If the region is not recognised correctly and game is not run properly, just change the region and restart the game.
I am not using any filters, but I like scanlines. You may also want to disable the overscan to hide that pixel garbage on the side.

Super Nintendo
It’s better to set the region to Auto, because if roms and region will mismatch, the audio will be stuttering. At first I thought the emulation is that bad, but then I found out, that the region was set to Europe and NTSC roms don’t run correctly with this setting.
I don’t think image filters should be applied for this system, because games look good anyway. Scanlines look perfect.

Sega Mega Drive/Genesis
Really cool is the possibility to disable the overscan. The image will be zoomed in and all those coloured frames above, below or on both sides will be hidden. I don’t like using image filters with this system, but scanlines are very good.
I highly recommend using controllers with Sega button layout, like those new from retro-bit. Just don’t forget to map buttons.
Game Boy / Game Boy Color
The only system where I may consider enabling image filters, because the resolution is that small. You can enable/disable Super Game Boy frames and also change the hardware type (from normal Game Boy to Super Game Boy). There’s also the possibility to change colour palettes in Game Boy Color mode.

Game Boy Advance
Another platform with great support. Consider enabling filters, because the resolution is quite low.
It’s a pity you cannot adjust the gamma for GBA because many games are too bright (this was done because the display of the console was too dark).
PC Engine / TurboGrafx
I like PCE/TG16 a lot, there are so many great shooters and shoot’em’ups. But the emulation is not perfect. Maybe my settings are wrong, but I see a noticeable jitter, so interpolation setting would be welcome, but they are missing. I’ve made a playlist where I play almost all games for this platform:

Sega Master System/Mark III
I don’t know if it’s emulation or the system itself, but the sound in some games is very strange. Another issues is that the controls don’t correspond to those set in options. I need to compare it with the original controller layout.
Here’s a playlist where I play all SMS (labeled as MKIII by Retro Freak) games:
Sega Game Gear
Nothing particular here, you can adjust all settings to make the picture a bit better.

Conclusion:
This is not a review, but I’d like to recommend RetroFreak anyway. It’s a very versatile console, supports a lot of platforms. Of course, it’s only emulation and you cannot compare it with the FPGA consoles like Super NT or Mega SG. But if you only want to have an access to so many platforms, it’s a very good japanese product.